Announcement

Collapse
No announcement yet.

Tree House

Collapse
X
 
  • Filter
  • Time
  • Show
Clear All
new posts

    Tree House

    When my neighbor decided to sell his place and move away the buyer stated he had to get rid of his chicken coop before she would purchase the place. Evidently, she is deathly afraid of chickens…maybe childhood trauma?? I don’t know, but either way I let him know I was interested in it and he was kind enough to give it to us. Pretty sweet deal. At the time we were in the midst of building our house and shop. Chickens are on “the list” but not exceptionally high. Bigger fish to fry and all…so I just set the coop back behind the shop.

    One day our kids’ Godparents came to visit and see the place for the first time. As we walked from the shop to the house I was about to brag on our nice/future chicken coop. However, before I could say anything, Ronnie (Godfather) asked if that was the girls’ play-house. This got my hamster spinning upstairs.

    Click image for larger version

Name:	2021-03-06 11.37.29.jpg
Views:	1
Size:	302.7 KB
ID:	25256127


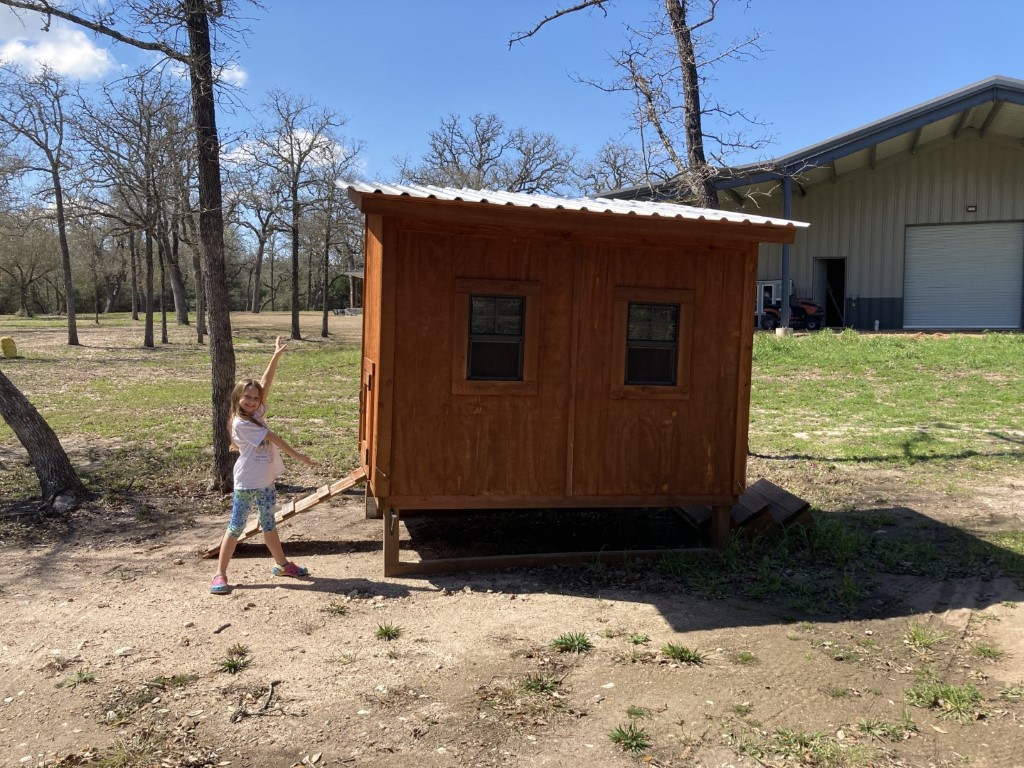
    Even before we signed the purchase contract on our property in 2018 my girls began to ask me if they could have a tree house. Thanks to Ronnie, their dream became my goal. Next step, how, where and how?

    Click image for larger version

Name:	2021-03-06 11.36.31.jpg
Views:	1
Size:	397.2 KB
ID:	25256128

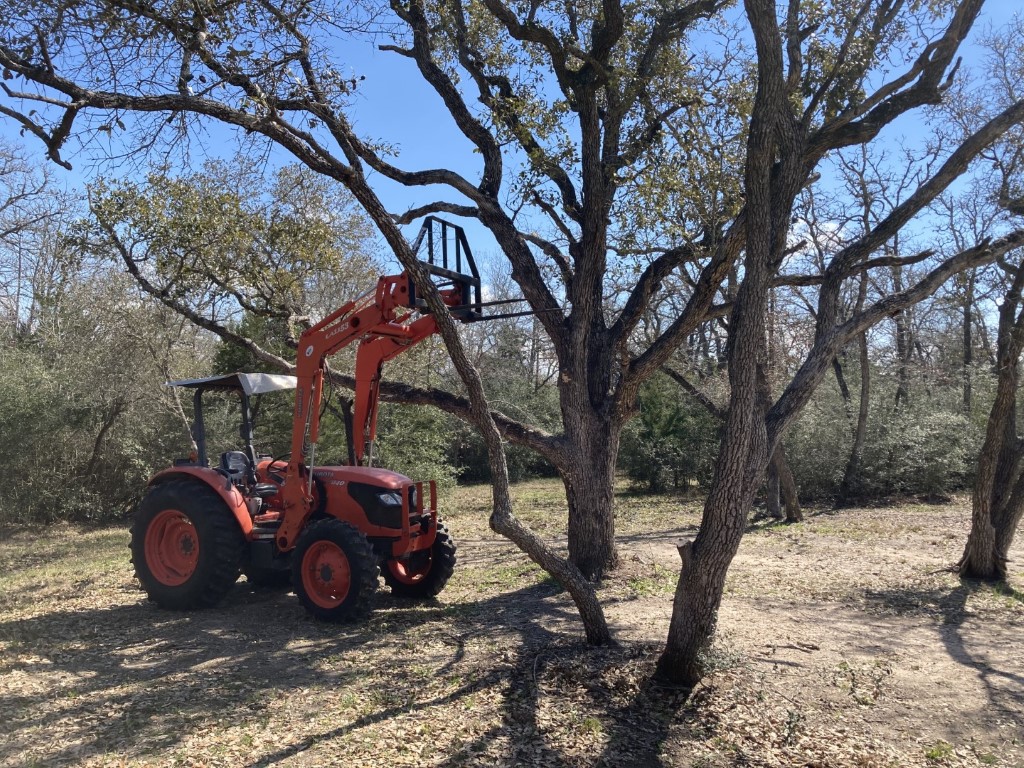
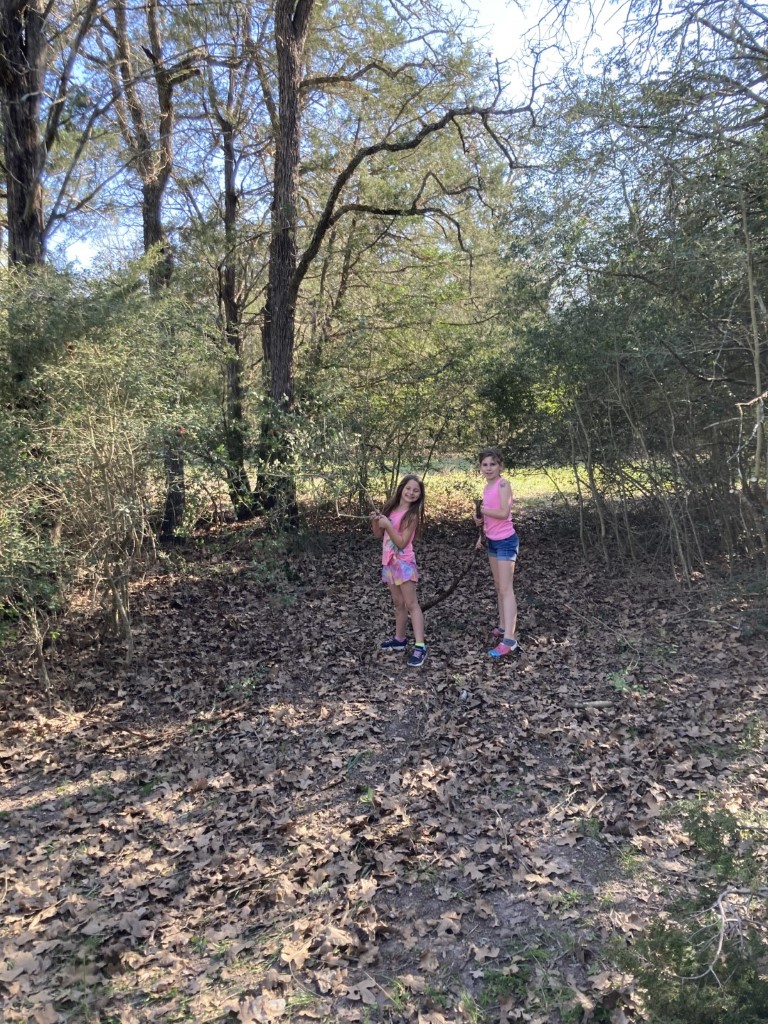
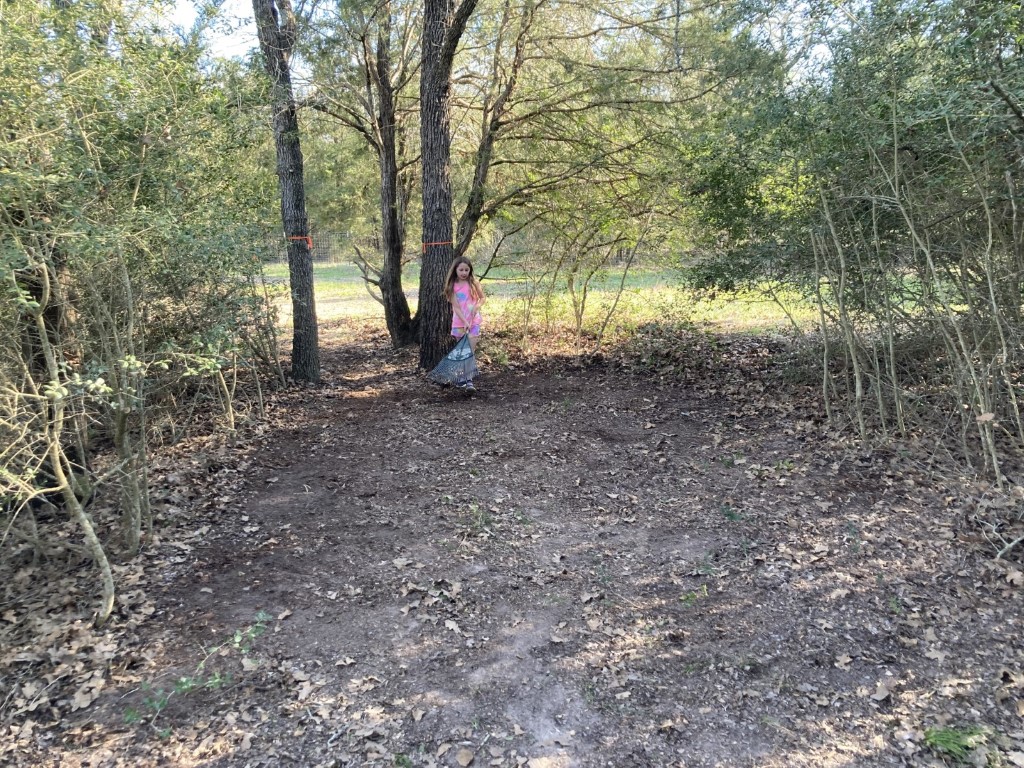
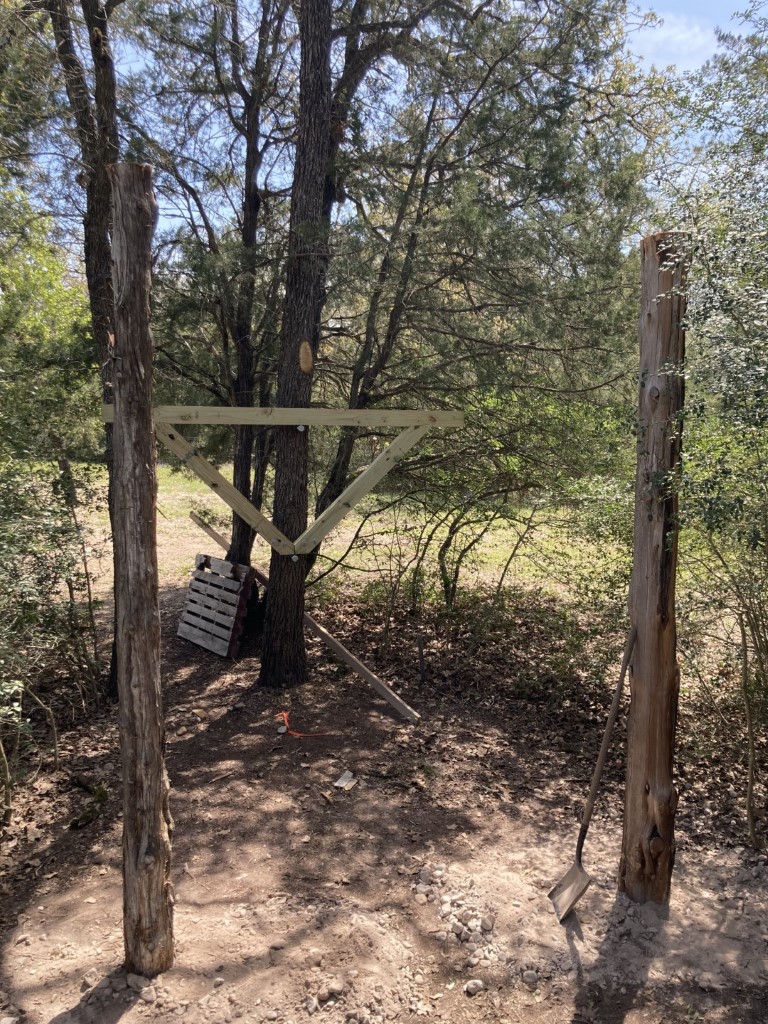
    I had used the tractor to move the coop…eeerrrr play house the first time so I figured, why not use it to lift it into place as a tree house. Few measurements later and I had my upper limit figured out. The tree in the picture was where I first intended to place it but after a ton of head scratching I just couldn’t figure out a way to place it there without cutting off at least one big limb. So I wondered around the opening near the house until I came up with a plan B.

    Click image for larger version

Name:	2021-03-20 17.06.50.jpg
Views:	1
Size:	418.7 KB
ID:	25256129

    Click image for larger version

Name:	2021-03-20 17.31.32.jpg
Views:	1
Size:	410.8 KB
ID:	25256130

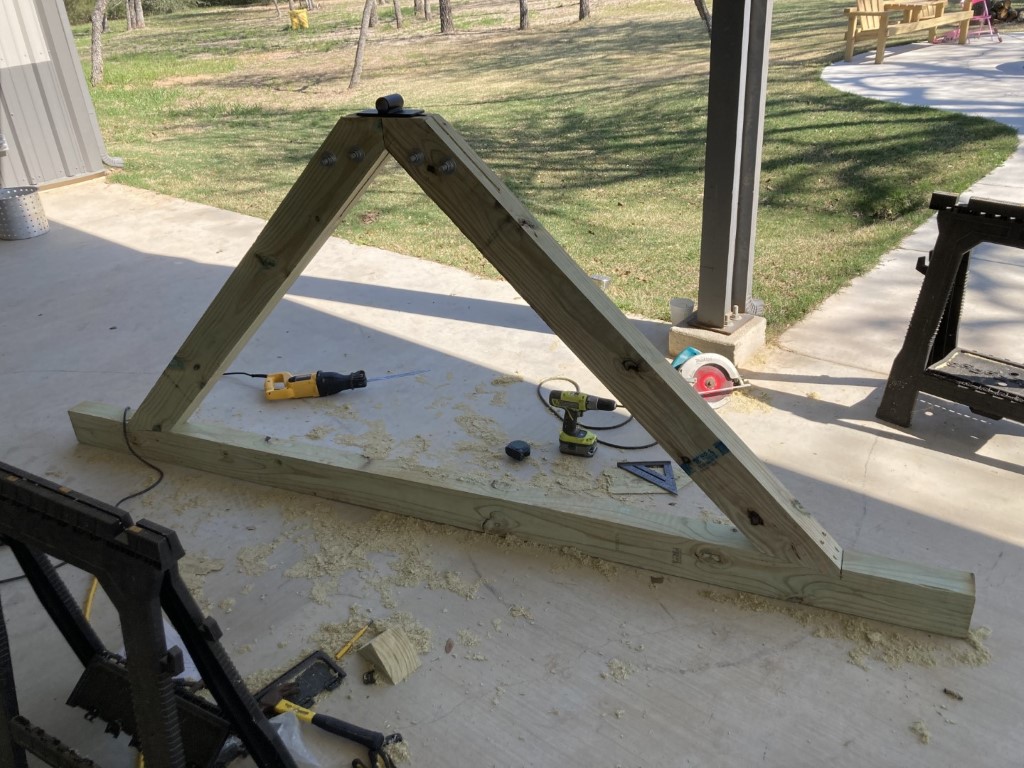
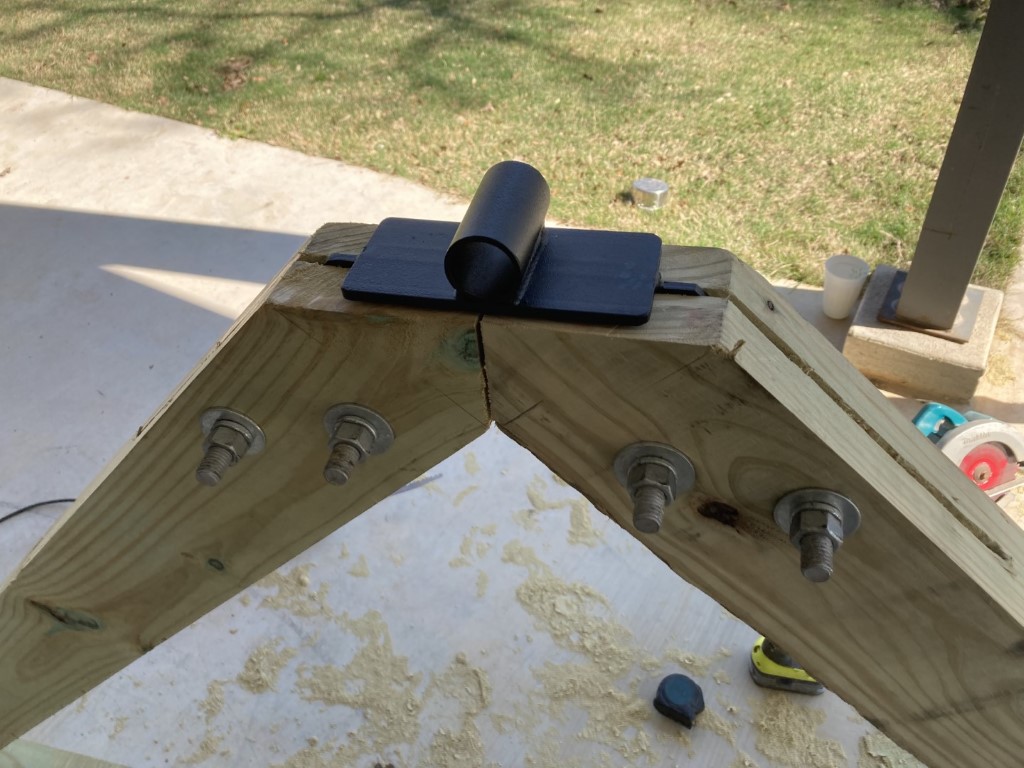
    In my head, a true tree house must be completely supported by trees. Unfortunately, that simply wasn’t in the cards so I had to compromise. My plan: support half the structure with one tree and the other half with two posts. I ordered some components from a tree house supply place and went to work creating a “tri-beam” otherwise known as a double knee brace. The order consisted of a 1.25” pipe bracket, double knee bracket and a couple 1.25”x15” lag bolt. Here is a picture of the double knee bracket

    Click image for larger version

Name:	double knee brace.jpg
Views:	1
Size:	21.3 KB
ID:	25256137

    Click image for larger version

Name:	2021-03-20 16.18.08.jpg
Views:	1
Size:	225.5 KB
ID:	25256131

    Click image for larger version

Name:	2021-03-20 16.18.15.jpg
Views:	1
Size:	184.3 KB
ID:	25256132

    Click image for larger version

Name:	2021-03-20 17.41.50.jpg
Views:	1
Size:	297.7 KB
ID:	25256133

    Click image for larger version

Name:	2021-03-21 12.44.41.jpg
Views:	1
Size:	388.8 KB
ID:	25256134

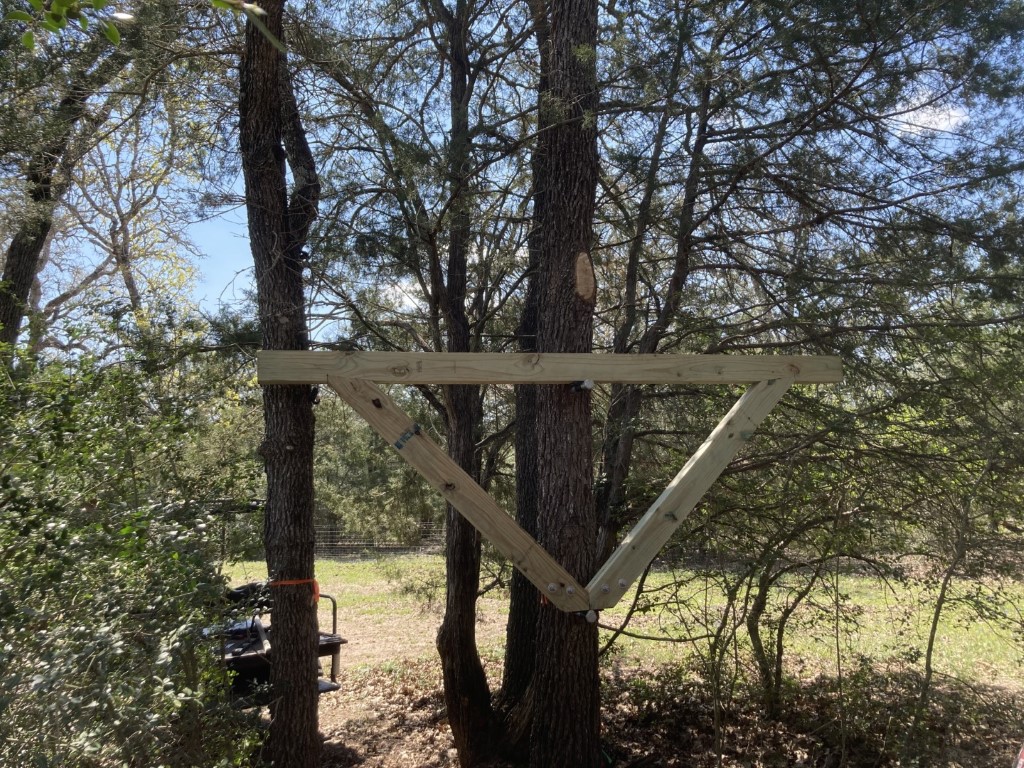
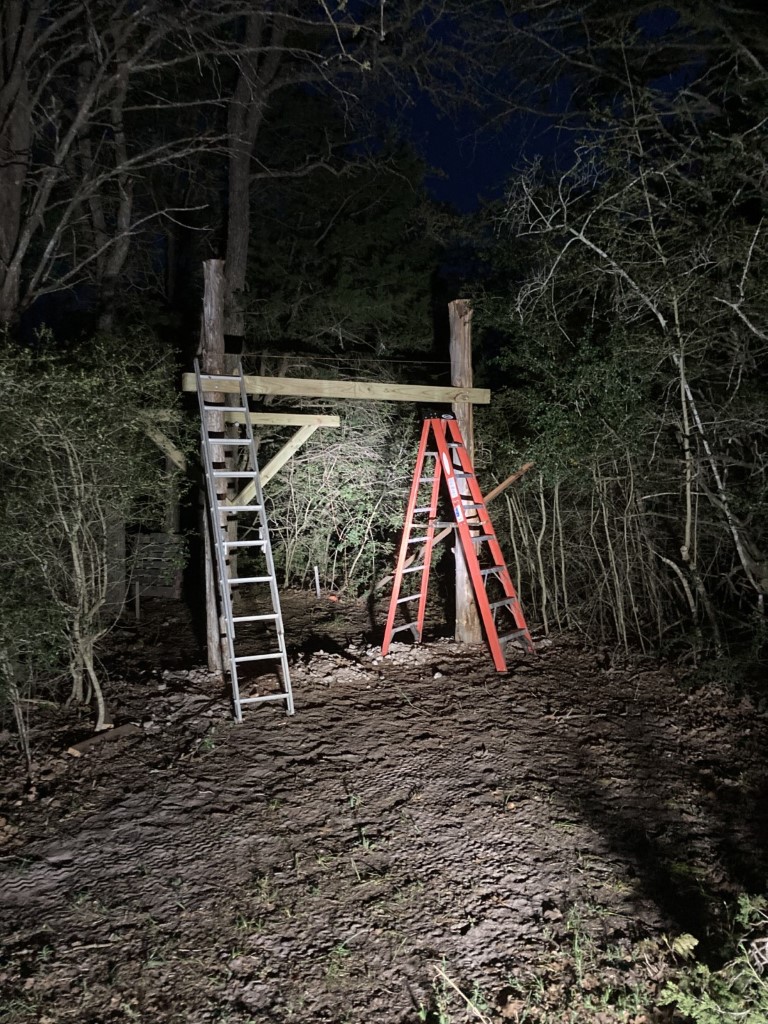
    Neighbor down the road had a stockpile of large cedar tree posts that he had cut off his place. He graciously donated a couple to the cause. Thanks to the sand and rock combo in this location, I practically had to dig these holes by hand.

    Click image for larger version

Name:	2021-04-02 14.24.42.jpg
Views:	1
Size:	402.7 KB
ID:	25256135

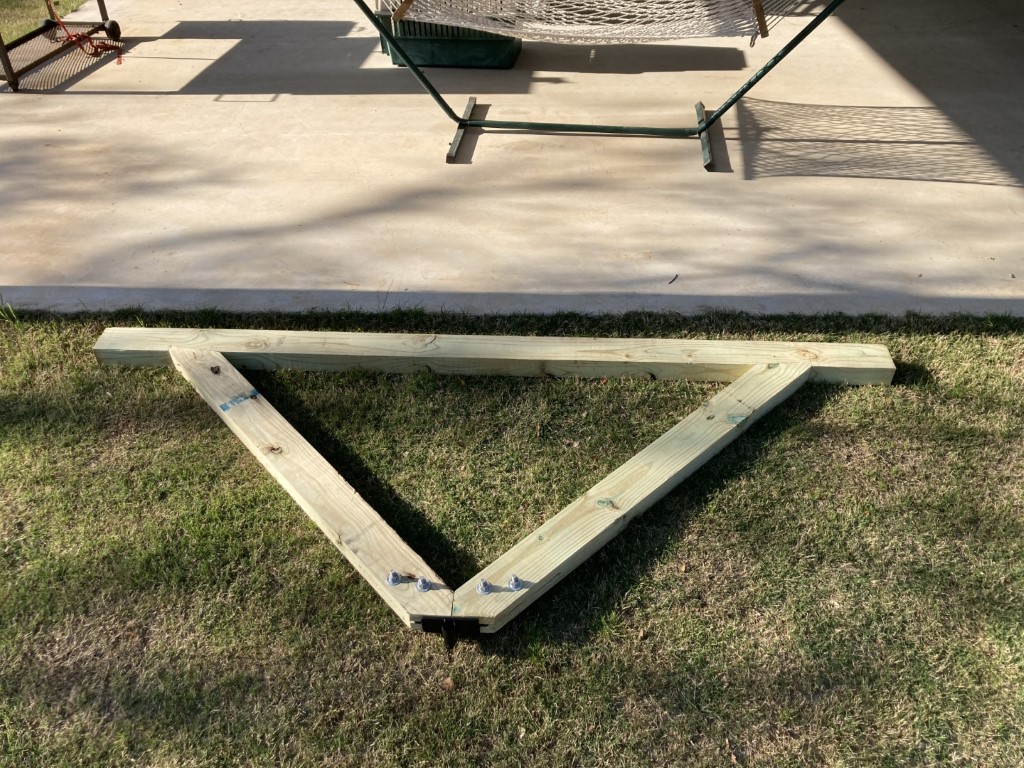
    Next challenge was trying to install the beam between the posts. This was about the time I started to really figure out that working in the air adds a whole new dimension to trying to make things level and square. I cut notches in each post and bolted in the beam.

    Click image for larger version

Name:	2021-04-06 20.21.30.jpg
Views:	1
Size:	328.8 KB
ID:	25256136

    More to come…

    #2
    Nice. Glad to see you notched those in instead of bolting on the side of the cedar post.

    Sent from my moto z3 using Tapatalk

    Comment


      #3
      So far, so good !

      Comment


        #4
        Next up were the joists and blocking between. I used 2”x8”x14’ for the joists.

        Click image for larger version

Name:	2021-04-18 09.23.33.jpg
Views:	1
Size:	397.5 KB
ID:	24658128

        Click image for larger version

Name:	2021-04-18 11.04.56.jpg
Views:	1
Size:	263.0 KB
ID:	24658129

        Then I was able to add a few of the deck boards. The girls were excited and a bit nervous to climb up.

        Click image for larger version

Name:	2021-04-19 19.48.44.jpg
Views:	1
Size:	315.1 KB
ID:	24658130

        Click image for larger version

Name:	2021-04-19 19.53.18.jpg
Views:	1
Size:	402.0 KB
ID:	24658131

        The big move was next. Uncle Brian, my brother, came to help with this part. He drove while I directed. We took our time and wiggled it almost exactly into position. Had to take care of a few extra limbs that were in the way but she fit up there easier than I expected. A bit of brute strength later and I had it exactly where I wanted it.

        Click image for larger version

Name:	2021-05-15 15.43.00.jpg
Views:	1
Size:	364.6 KB
ID:	24658132

        Click image for larger version

Name:	2021-05-15 16.06.09.jpg
Views:	1
Size:	378.4 KB
ID:	24658133

        Click image for larger version

Name:	2021-05-15 16.06.17.jpg
Views:	1
Size:	366.6 KB
ID:	24658134

        Click image for larger version

Name:	2021-05-15 16.38.35.jpg
Views:	1
Size:	430.1 KB
ID:	24658135

        Click image for larger version

Name:	2021-05-16 13.42.22.jpg
Views:	1
Size:	236.6 KB
ID:	24658136

        Comment


          #5
          You are a good Dad. Those girls will love it and good work.

          Comment


            #6
            "Treehouse supply co"?

            What kind of sissy man are you?

            Does it still smell like chicken poop?


            Good job, Chad!

            Comment


              #7
              That's a goofy looking dude on the tractor!!!

              Comment


                #8
                Way cool

                Comment


                  #9
                  That’s cool

                  Comment


                    #10
                    Awesome!!

                    Comment


                      #11
                      Originally posted by Texastaxi View Post
                      "Treehouse supply co"?

                      What kind of sissy man are you?

                      Does it still smell like chicken poop?


                      Good job, Chad!
                      Well, you know, like any engineer worth his salt, I over evaluated the crap out of building brackets or buying them. After a 3 page report and extensive spreadsheet, I determined it was in my best economic interest to outsource this component of the job. That and no one around here has 1.25"x14" lag bolt just laying around.

                      Originally posted by Huntin Addict View Post
                      That's a goofy looking dude on the tractor!!!
                      No doubt!! But he earned Uncle brownie points.

                      Comment


                        #12
                        Now that the tree house was in place I finished out the decking. I made sure each board overlapped the edge sufficiently. I’d trim these off at a later date to make sure they were in a nice straight line.
                        Click image for larger version

Name:	2021-06-24 20.13.22.jpg
Views:	1
Size:	256.5 KB
ID:	24658161

                        Click image for larger version

Name:	2021-06-24 20.13.29.jpg
Views:	1
Size:	290.7 KB
ID:	24658162

                        The railing took me a bit to figure out. I wasn’t quite sure how I wanted to do this. I watched some videos and looked around on the internet to find some inspiration. I considered going around our property and cutting cedar limbs to serve as the railing stays, but eventually nixed that idea in place of using hog panel. After some figuring I determined that you can cut hog panel exactly in half and use both halves. I set the bottom rail so there is a 3” gap down to the deck, top 2”x4” is set at 35”. I borrowed a dado blade from someone for my old table saw and using a ½” dado depth, you end up with 30” width on the panel. This saved me in material cost. I also drilled a couple of holes along each bottom 2”x4” rail so it wouldn’t hold water.

                        Click image for larger version

Name:	2021-06-29 18.51.13.jpg
Views:	1
Size:	333.7 KB
ID:	24658163

                        Click image for larger version

Name:	2021-06-29 19.57.02.jpg
Views:	1
Size:	377.2 KB
ID:	24658164

                        Click image for larger version

Name:	2021-06-29 19.56.52.jpg
Views:	1
Size:	336.3 KB
ID:	24658165

                        Click image for larger version

Name:	2021-06-27 19.20.34.jpg
Views:	1
Size:	268.3 KB
ID:	24658166

                        Comment


                          #13
                          Diggin the railing! Thumbs up!

                          Comment


                            #14
                            For the ladder into the tree house I made a ships ladder using 2x12x14 and 2x6 for treads. I had fun building this monster.

                            Click image for larger version

Name:	2021-07-20 11.32.26.jpg
Views:	1
Size:	281.6 KB
ID:	24658198

                            Click image for larger version

Name:	2021-07-20 11.53.13.jpg
Views:	1
Size:	298.3 KB
ID:	24658199

                            Click image for larger version

Name:	2021-07-20 16.34.07.jpg
Views:	1
Size:	239.2 KB
ID:	24658200

                            Click image for larger version

Name:	2021-07-20 17.26.19.jpg
Views:	1
Size:	303.1 KB
ID:	24658201

                            Now that the ladder is installed and I put a cap on the rail, I’m calling it 95% complete and opened it up for the girls to play without supervision. I know I’ll be doing a few knick-knacks here and there for them. For instance, I may add a pair of swings underneath.

                            Click image for larger version

Name:	2021-08-10 19.09.44.jpg
Views:	1
Size:	309.1 KB
ID:	24658205

                            Click image for larger version

Name:	2021-08-10 19.06.04.jpg
Views:	1
Size:	337.2 KB
ID:	24658204

                            Click image for larger version

Name:	2021-07-20 18.28.15.jpg
Views:	1
Size:	376.3 KB
ID:	24658202

                            Click image for larger version

Name:	2021-08-10 19.04.02.jpg
Views:	1
Size:	421.8 KB
ID:	24658203

                            I still intend to install a firemen’s pole. You can see the hole I’ve left in the railing on the right hand side. We’ve simply ran some rope through the opening in the rail for now until I can get together what I need to put the pole in place.

                            Mom and the girls decorated the interior.
                            Click image for larger version

Name:	2021-08-10 19.07.03.jpg
Views:	1
Size:	212.3 KB
ID:	24658206

                            Click image for larger version

Name:	2021-08-10 19.08.05.jpg
Views:	1
Size:	251.5 KB
ID:	24658207

                            I’ve had fun building this. I wish it went together as quick as these post would indicate. The idea to use the tractor came in March and I just finished the ladder roughly 3 weeks ago. As always, I learned quite a bit along the way and added a few tools to the tool box.

                            Comment


                              #15
                              That ladder is the BOMB! Wow! So cool! And the fireman's pole! I can't wait to see that!

                              Comment

                              Working...
                              X