Announcement

Collapse
No announcement yet.

DIY/ build along hydraulic Shredder

Collapse
X
 
  • Filter
  • Time
  • Show
Clear All
new posts

    #31
    Originally posted by woodsman08 View Post
    Really enjoying this thread. Thanks for sharing

    Glad to hear it. There really wasn't much info out there when I started contemplating building one of these a couple years ago.

    Comment


      #32
      Going work on mounting and push-bar/frontal protection.

      Comment


        #33
        Blade carrier is done. Weighed 200lbs before welding....so add 2 or 3 pounds.

        The 2 blades and bolts weigh a combined 28pounds.

        Comment


          #34
          I work on shredders and tractors for a living, and you sir are building a beast cant wait to see how it ends up with the 4 blade set up. Should be a cutting sum gun

          Comment


            #35
            Originally posted by Bowtech38 View Post
            I work on shredders and tractors for a living, and you sir are building a beast cant wait to see how it ends up with the 4 blade set up. Should be a cutting sum gun

            Thanks brother....I hope you're right!

            I'am unable to run 4 blades, unless I trim the blades...which sounds counter productive in the long run. I will be running 2 blades...I believe they are Alamo Industrial's Boom-Axe blades. 5/8" thick, I think they are 12 pounds.

            If this works out well, I will be building a new blade carrier for my 72"...do you have any recommendations for blades?...anything 5/8" or thicker?

            Comment


              #36
              The quick-attach plate is done.


              The main plate is 5/16", the top rail and bottom "plates" are 3/8"

              Comment


                #37
                Built a little safety cage/protection for the driveshaft...drilled and tapped the motor mount.

                Comment


                  #38
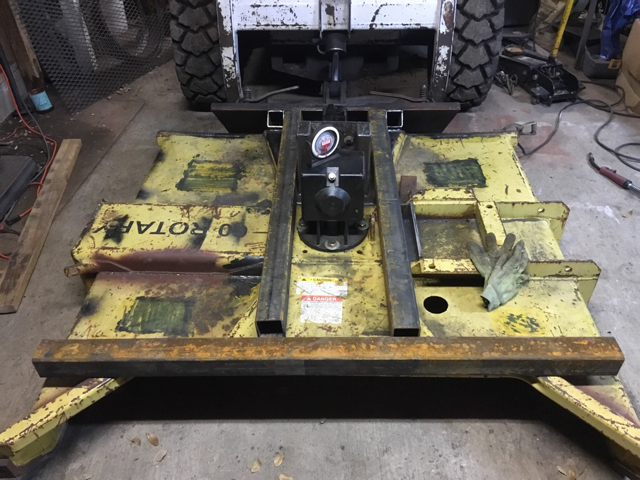
                  The quick attach (QA) plate has been welded to the deck and I fired up the Bobcat and rolled the deck all the way back...no clearance issues. I used 3" square tubing, 3/16" wall. I wanted to keep a gap between the QA and the deck to allow for all the small debris to fall through....my Bradco does a fine job of collecting it all, even with the hinged hood.

                  Here you can see the makings of the push bar. I'm going to connect it to the 3/8" plate from the original boom mount. I will build uprights for the frontal protection.

                  Comment


                    #39
                    Excellent write up. Please update when you have had an opportunity to try it out some.

                    Comment


                      #40
                      Originally posted by Big H View Post
                      Excellent write up. Please update when you have had an opportunity to try it out some.

                      Thank you....hopefully this week!!

                      Comment


                        #41
                        Push bar rails are secured to the Q/A plate and the deck.

                        Comment


                          #42
                          Very cool

                          Comment


                            #43
                            Now this is an awesome build. Great job so far!

                            Comment


                              #44
                              Verticals are in place...36" high

                              Comment


                                #45
                                Top and middle bars are welded in place. Going to install heavy expanded metal/screen stuff....I forget the technical term.....in between each bar.

                                Comment

                                Working...
                                X