Announcement

Collapse
No announcement yet.

Cultipacker Rebuild

Collapse
X
 
  • Filter
  • Time
  • Show
Clear All
new posts

    Cultipacker Rebuild

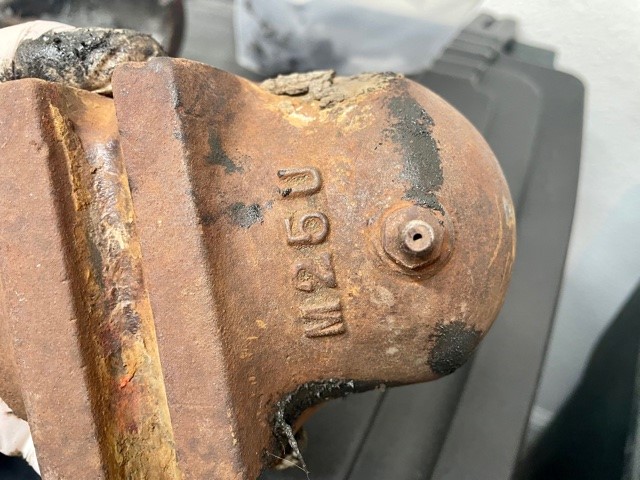
    So picked up a a four foot cultipacker from a TBH member to pull behind an ATV. Was a nice find and as always, a great TBH member to deal with - thanks Bret

    Click image for larger version

Name:	CP 1.png
Views:	1
Size:	462.5 KB
ID:	25243862


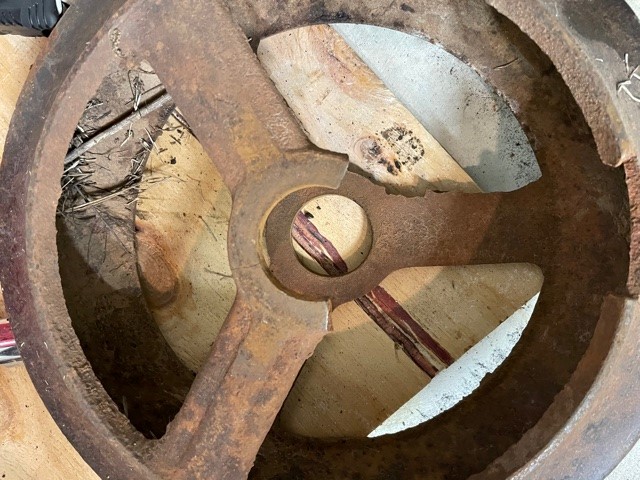
    When purchased I anticipated that I would be changing the bearings. However, when I got it apart I realized that the bearings were wood bearings. Never seen that before. After some internet research, found that they were originally maple bearings that they would soak in Lin Seed Oil. The bearing holders were worn and oblong so they really were not usable.

    Click image for larger version

Name:	CP2.jpg
Views:	1
Size:	108.2 KB
ID:	25243863

    Click image for larger version

Name:	CP3.jpg
Views:	1
Size:	105.5 KB
ID:	25243864

    Click image for larger version

Name:	CP4.jpg
Views:	1
Size:	98.4 KB
ID:	25243865

    Click image for larger version

Name:	CP5.jpg
Views:	1
Size:	118.1 KB
ID:	25243866

    Click image for larger version

Name:	CP6.jpg
Views:	1
Size:	123.4 KB
ID:	25243867

    Click image for larger version

Name:	CP7.jpg
Views:	1
Size:	116.1 KB
ID:	25243868

    Click image for larger version

Name:	CP8.jpg
Views:	1
Size:	96.3 KB
ID:	25243869


    Since the option to replace the wood bearings was not realistic (which I did find a maker on the internet) decided to go a different route, I figured I would fix forever.

    So I decided to get some new 3/8 inch steel places made that would hold modern day bearings.

    Also found a broken wheel, so ordered a replacement.

    The shaft was in bad shape since the old wood bearings were long gone.

    Click image for larger version

Name:	CP12.jpg
Views:	1
Size:	112.2 KB
ID:	25243871
    Attached Files
    Last edited by wellingtontx; 03-15-2021, 11:04 AM.

    #2
    Then to the remake.

    Cleaned the drive shaft up and replaced the broken wheel.

    Got the new ends back from the shop. First install realized my drive shaft was a little short for the new design so had to turn the ends around. I anticipated that this might be the case, so no problem - after a couple of new drill bits and a lot of muscle. Add a couple of trips to Tractor Supply for new grade 8 bolts.

    Ordered some collar shafts to keep the wheel shaft from moving from side-to-side off of Amazon.

    End bearings off of Amazon as well.

    Click image for larger version

Name:	CP13.jpg
Views:	1
Size:	88.9 KB
ID:	24646053

    Click image for larger version

Name:	CP14.jpg
Views:	1
Size:	79.3 KB
ID:	24646054

    Click image for larger version

Name:	CP15.jpg
Views:	1
Size:	74.9 KB
ID:	24646055

    Click image for larger version

Name:	CP16.jpg
Views:	1
Size:	89.0 KB
ID:	24646056

    Click image for larger version

Name:	CP17.jpg
Views:	1
Size:	110.1 KB
ID:	24646057

    Click image for larger version

Name:	CP18.jpg
Views:	1
Size:	115.0 KB
ID:	24646058

    Click image for larger version

Name:	CP19.jpg
Views:	1
Size:	104.2 KB
ID:	24646059

    Click image for larger version

Name:	CP23.jpg
Views:	2
Size:	156.5 KB
ID:	24646060
    Last edited by wellingtontx; 03-15-2021, 10:58 AM.

    Comment


      #3
      That looks good and should last forever!

      Comment


        #4
        Thanks

        Comment


          #5
          Great looking rebuild

          Comment


            #6
            Great job!

            Comment

            Working...
            X