Announcement

Collapse
No announcement yet.

Building my own recurve.

Collapse
X
 
  • Filter
  • Time
  • Show
Clear All
new posts

    Building my own recurve.

    Well, I'm going to do it! I have been restoring old bows now for a while and have done several. Now, I'm going to build one using Binghams Projects plans and materials. I know there are several on here that have built bows and a few that I would consider masters of the craft, if any of you have tips, pointers, comments or suggestions please post them.
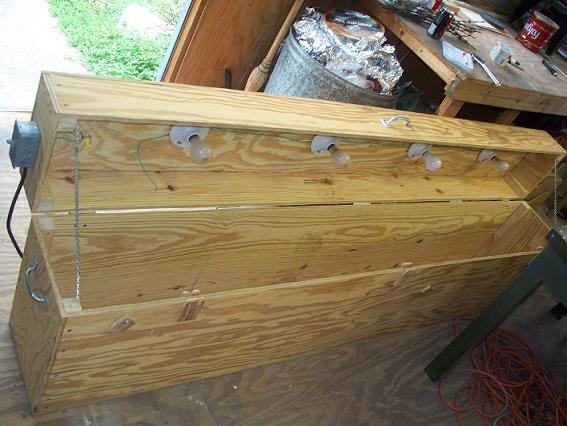
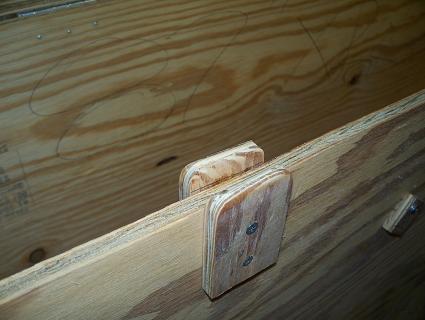
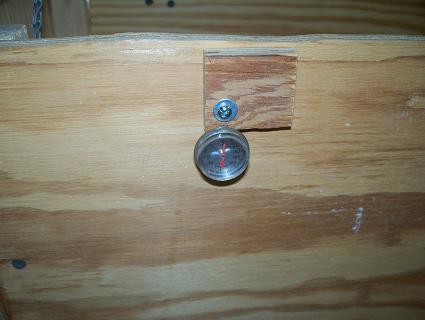
    So, here we go. First I had a friend give me a "hot box" that he built, used once then gave up on the building of bows. I did some modifications to it, he had it "insulated" with common aluminum foil and the thermostat was broken. I added chains to the lid, a new thermostat, insulated with aluminum backed foam board, added a fan, two power indicator lights, and some wood to help line up the lid. I also drilled three small holes and added "covers" over them so I can check the temp. in the box.
    Click image for larger version

Name:	100_2113.JPG
Views:	3
Size:	62.5 KB
ID:	24966508

    Click image for larger version

Name:	100_2115.JPG
Views:	1
Size:	36.0 KB
ID:	24966509

    Click image for larger version

Name:	100_2116.JPG
Views:	1
Size:	33.6 KB
ID:	24966510

    Click image for larger version

Name:	100_2119.JPG
Views:	2
Size:	40.7 KB
ID:	24966511

    #2
    Before I did the mods. to the hot box I actually started my form. Sorry, I didn't get any pics of gluing and cutting the form. What I do have pics of are some stands I made to hold the form. Just some scrap wood and screws. I started to really goof and rush building my form. I hate to admit it, but I was reading another forum(sorry) and read it is very important to spend a little extra time on the form and get it right. The bottom of the form needs to be very smooth and even, no waves and square to the sides. I checked it a little closer and found lots of high and low spots and it wasn't very square...bummer. So, using a square I marked the high spots and will go over it several times with a belt sander to smooth and square it. The places with the pencil lines are high.
    Click image for larger version

Name:	100_2126.JPG
Views:	1
Size:	31.9 KB
ID:	24203852

    Click image for larger version

Name:	100_2127.JPG
Views:	1
Size:	40.6 KB
ID:	24203853

    Click image for larger version

Name:	100_2129.JPG
Views:	1
Size:	31.5 KB
ID:	24203854

    Click image for larger version

Name:	100_2130.JPG
Views:	1
Size:	32.3 KB
ID:	24203855

    Click image for larger version

Name:	100_2132.JPG
Views:	1
Size:	25.0 KB
ID:	24203856

    Comment


      #3
      Hey Matt, the first one is always an adventure! You will learn lots during this build I promise. I can't really tell in the pic's, are you building a one piece or a take down? I will be following!

      Comment


        #4
        Congrats Matthew,
        seems like the hard part is over, that's getting time to do one.
        The Binghams is a great bow to start with, it's a great shooter when completed.

        I'll be following......

        Comment


          #5
          I'm going to do a one piece 58", 50 lb is what I'm trying for. I went with black glass, maple cores and green mountain camo coreflex riser material.

          Comment


            #6
            I like that Green Mountain Camo, I've used in risers before, but I really like it as limb laminations! Good lookin stuff

            Comment


              #7
              I ordered some custom colors for myself in the weed colors where I like to hunt. When ya cut it right it shows all the grain patterns.
              Bamboo core is just about the best after Red Elm. (JMHO)

              Comment


                #8
                Being my first I just went with some basic materials, I'd hate to spend lots more $$ and then ruin some really nice materials. I'm already kinda bummed about this build........ I finally get things started and really rolling good and then I had to come to work today! 24 hours at the fire station before I can get back to my shop! We have a big box hardware store in my district so we can swing by there, I guess that will help hold me over till I'm off.
                Greywolf, post some pics of that bow when its finished!

                Comment


                  #9
                  This is the bow I made for my Taxidermist in trade for doing my Red Stag mount. the bow is in Texas it's for his wife. I'll see if he has some pictures of her shooting or the bow.

                  I had some but can't seem to find the file I put them in. the rise is out of the same colors, I loved this bow, I was thinking of keepin it for my self, but I made a promise and I always keep my promises. So I shipped it off to her.

                  Comment


                    #10
                    Subscribed. I just started my first as well. 62" Take down recurve. Shooting for 60-62#s. Clear class, maple cores, self milled maple riser with mahogany and glass accents. Felix40 is helping me since he has built several. I've got both limbs off the press and the riser is cooking now.

                    You can put a strip of some material like fiberglass down the length of the form to help true up any subtle inconsistencies.

                    Comment


                      #11
                      Originally posted by LeanMachine View Post
                      ......You can put a strip of some material like fiberglass down the length of the form to help true up any subtle inconsistencies.
                      When you order a kit from binghams they include tapers and a formica strip to build the form with. I still want to try and get the form as true as I can.

                      Comment


                        #12
                        Originally posted by LeanMachine View Post
                        Subscribed. I just started my first as well. 62" Take down recurve. Shooting for 60-62#s. Clear class, maple cores, self milled maple riser with mahogany and glass accents. Felix40 is helping me since he has built several. I've got both limbs off the press and the riser is cooking now.

                        You can put a strip of some material like fiberglass down the length of the form to help true up any subtle inconsistencies.
                        Yes Sir you sure can, if you call Binghams and tell them you want a press bed strip they will send you one it's basically a Lamination not ground to specs and is cheaper than a piece of Fiberglass.
                        Or do what I do on all my presses is I run a 1/8 piece of Flat stock aluminum on the press bed as wide as the press it's self(nothing wider) I sand the back with 36 grit to really rough it up. Then my first lay up, the first thing to get epoxied is the flat stock.
                        I tape it in place, wrap it in plastic (Cling wrap) then I lay down another piece of plastic(cling wrap) and glue up my bow on top of that. Once the bow is out of the oven, I drill and countersink holes along the press at center, at the fades,top of the bends in the press and the ends. then I epoxy those screws in place, then fill and sand the screw holes with Bondo and sand and smooth those areas, You will never again have to worry about small divots in the press bed and it will last for 10s and 10s and 10s of bows.

                        Comment


                          #13
                          Matt I am curious though, did you use the "router method" when you cut that form out? I have really great results when cutting it out like that.

                          Comment


                            #14
                            TMiddleton, I'm finding out you are correct about the first being an adventure! I used the bandsaw and sanding drum.
                            Well, after getting some pointers from others who have already done this we have found a fatal flaw in my form. Its too wide. So, I get to start over and build a new form, and I think I will do it like Greywolf described above. Next planed time in shop, 5/28 1400 hrs. CST, will update after that.

                            Comment


                              #15
                              Well since it's going to be a little while before you get back on your form, give this a look over...

                              Comment

                              Working...
                              X