
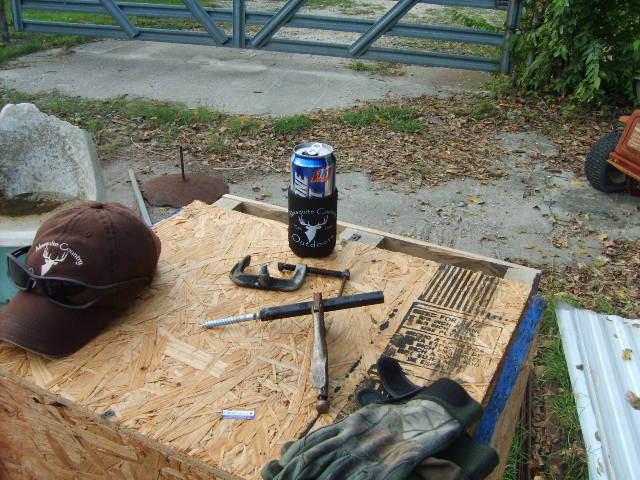
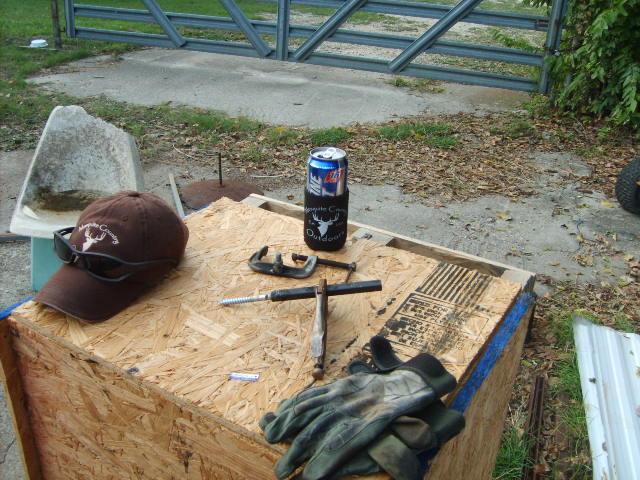
Ok, so far I have made 2 or 3 of the arms like Smart did....stole/borrowed his idea....but I kept wanting to make one that would work screwing in to wood or could be clamped on to a stand....I think I may have found what I've been looking for after a few semi-succesful attemts.....more info tommorow.
-
-
Dang Darryl.... if you ever decide to quit drinkin' Keystone/Coors stock is gonna plummet.
-
I got yer back, D.Originally posted by Smart View Post
I'm kickin around the idea of a plate to screw to the tree with an arm for the camera, one for the bow, and another plane hood for your backpack. Maybe after the current, and next job are out of the way....Comment
-
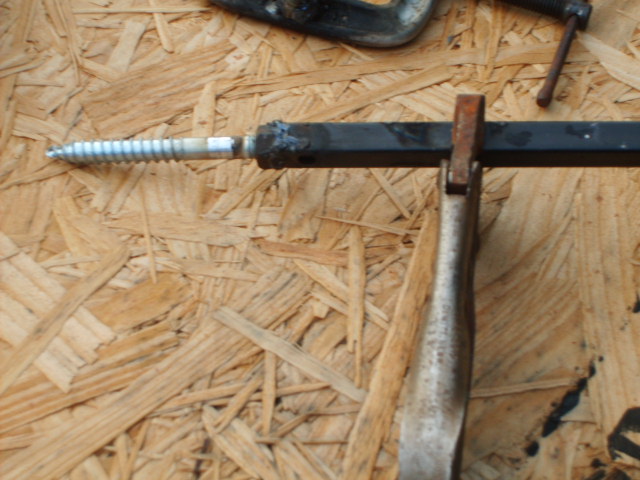
Hope that's a hardened lag. If not, it's gonna shear. Trust me.
Looks good. In the past, I've cut the thread end off a tree step and used it in order to keep things from coming from together.Comment
-
Where did that cap come from...nice logo on it!
I have a a couple of screw in tree steps that I was going to use to weld to some tubing to make a camera arm or bow holder.
Easier to start that a lag bolt too.Comment
-
If it's not a hardened lag screw you can drill a pilot hole with one of those fast tapered, screw in steps and then screw your hootus in.Comment
-
OK, it's tomorrow already. Come on wid it.
BTW, your koozie is a little on the short side. 
>EComment
-
Hey Doc....don't you like it when you start/complete a DIY project and everybody tells you how it needs to be done.....
Comment
-
I've built a few, and like Casey said, cut treesteps seem to be the best when it comes to the screw part.
I'll be looking for the finished product...you never dissapoint!Comment
-
Oh yeah, get one of these to help get your hole started.

Comment
-
Nice. I've been drilling pilot holes for the more permanent ones with my drill driver, and using a tree step to make a hole one the others. I don't know if getting the lag scalding hot is making it any harder or not. I haven't put that to the test yet. Thanks for the input.
Smart the send me royalty checks every month.
D~Mo we need to tear up a coupla dirty thirtys.
Comment
-
Looking good Doc.....Won't do me much good though from a ground blind! LOLComment
-
Originally posted by dr. death View Post
getting it hot won't harden it. throw it in the campfire till a magnet wont stick to it then dunk it in some warmed (120-140 degree) oil. then put it in the oven for an hour at 400.Comment
-
Here are the rest of the pics. Sorry for the delay. I used it Sunday to film a buck and the arm worked great.
Comment
-
turned out real nice , i'm going to half to make me one of those....Comment

Comment