Announcement

Collapse
No announcement yet.

Custom Fly Rod Build

Collapse
X
 
  • Filter
  • Time
  • Show
Clear All
new posts

    Custom Fly Rod Build

    I promised to share a Fly Rod build here in the DIY section.

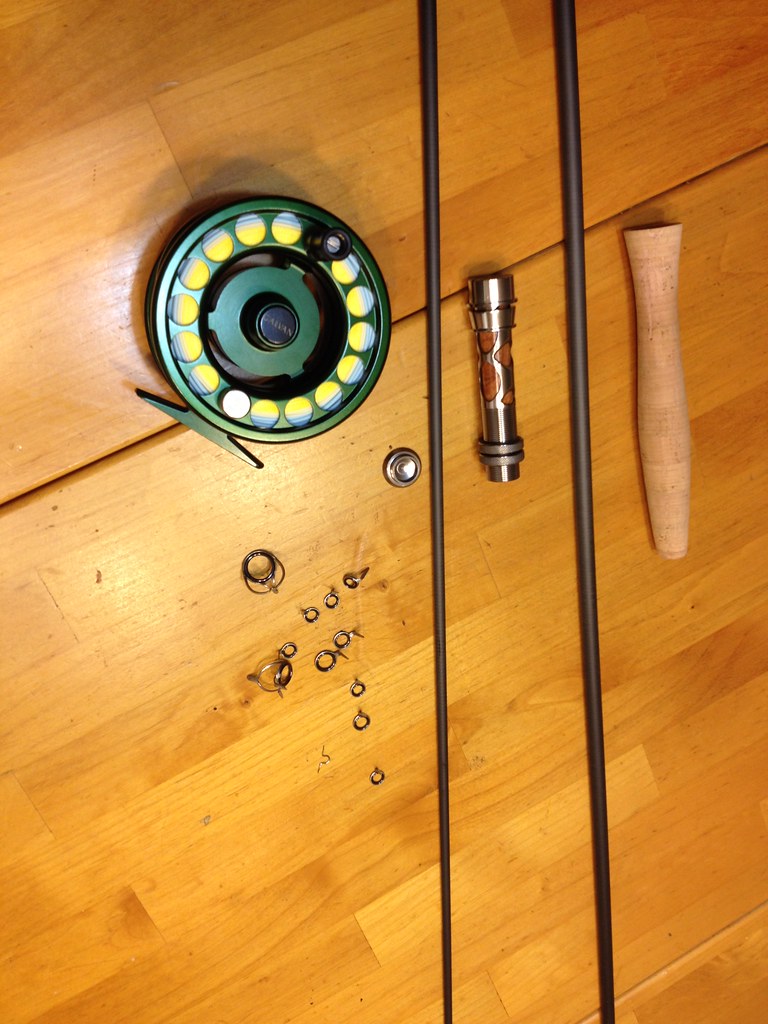
    Received my two piece MHX High Modulus graphite 9wt fly blank, aluminum reel seat with burled rosewood insert, titanium guides and Portuguese Half Wells cork grip in the mail yesterday.

    Fly rod builds are the easiest to build IMO. They are typically one or two gripped in configuration with a simple reel seat. The guides and guide spacings from the major blank manufacturers, provide a detailed guide placement fit to any of the modern fly blanks on the market today. The blanks bend, should flow with the line running through the guides, in a nice curve following the blank's bend. Any abrupt angles to the fishing line, that do not follow the blanks bend, should be adjusted to better allow the line to flow, following closely to the bend of the rod blank. Fly rod's work like spinning rods, guides are down with an under blank reel setup. Adjusting the guide placement, forward and or backward and adding additional guides, will help keep that bend between rod and line flow uniform.

    Each section of rod blank, in my rod's case - 2 pieces, will have a spine and a belly. The spine is the stiffer side of the rod and the belly, is opposite of the spine, belly = softer feel in the blank. For spinning and fly rods, you leave the spine on top and the belly below meaning, your guides will be along the softer side of the blank, with the stiffest side of the blank 180 degrees opposite of your row of guides. I will cover how to find the spine once we get to that section.

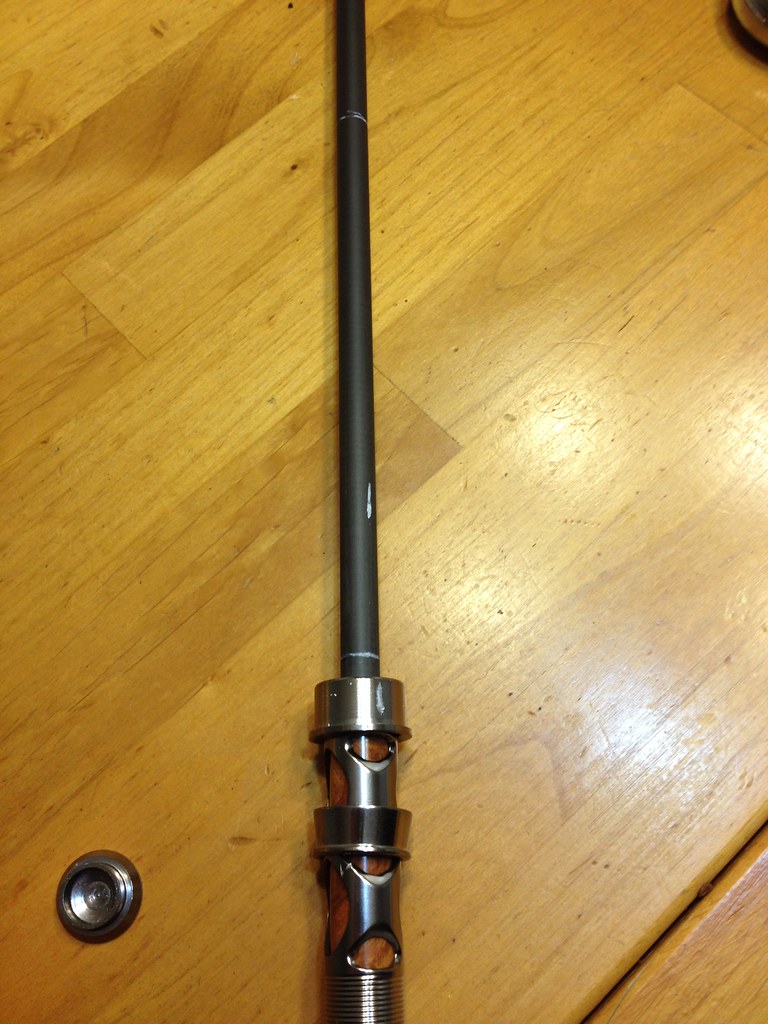
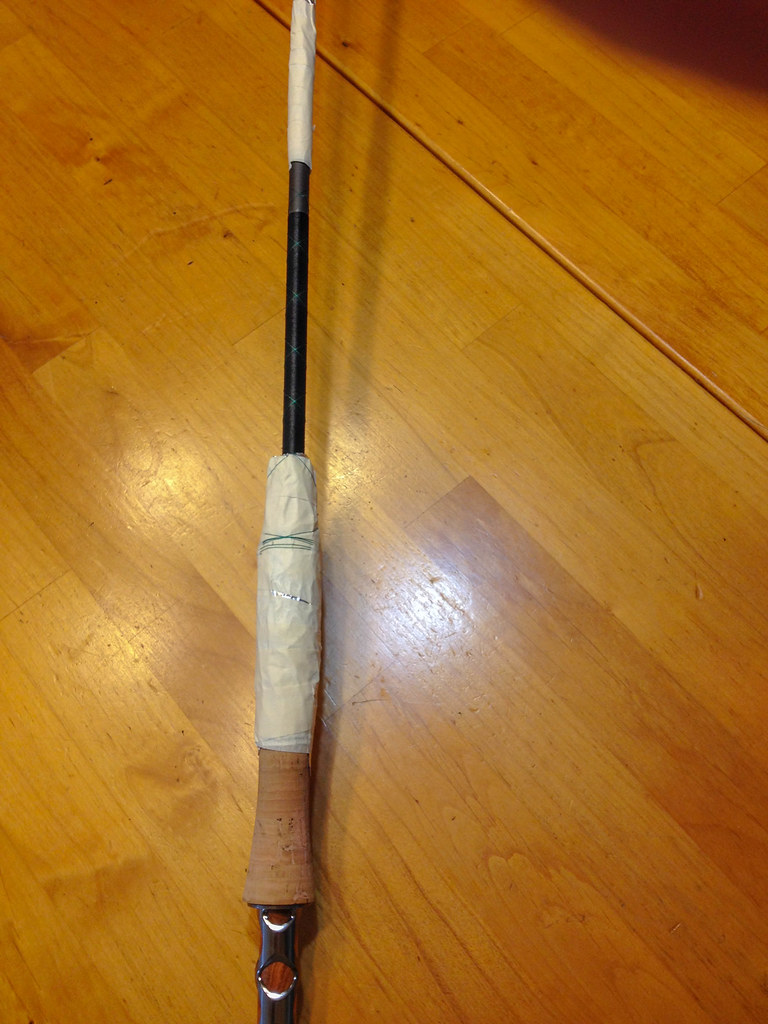
    Components minus my tip guide and the fly reel. The reel seat is assembled, excluding the little silver round circular butt cap. This will all get glued up to the blank when it's time.


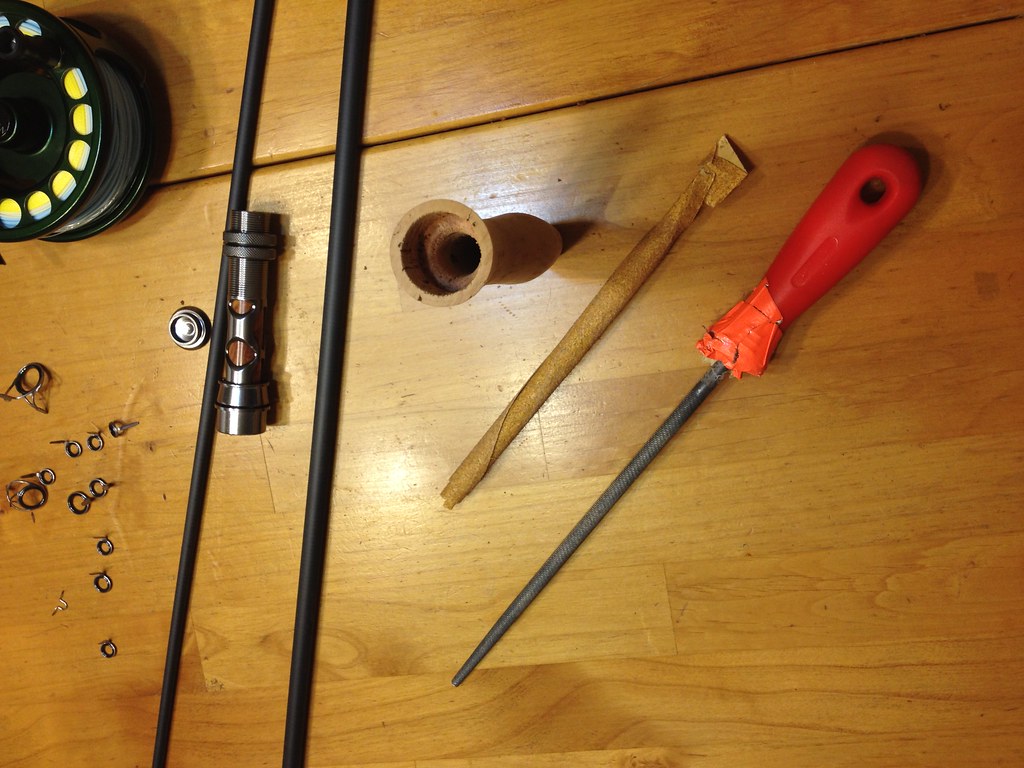
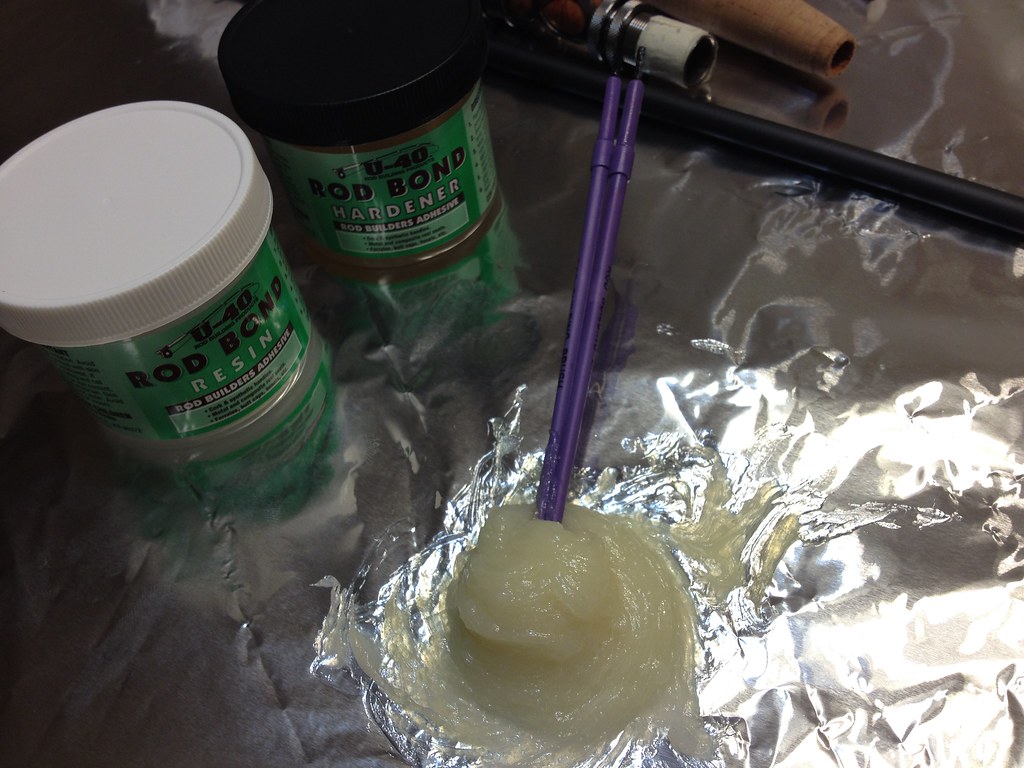
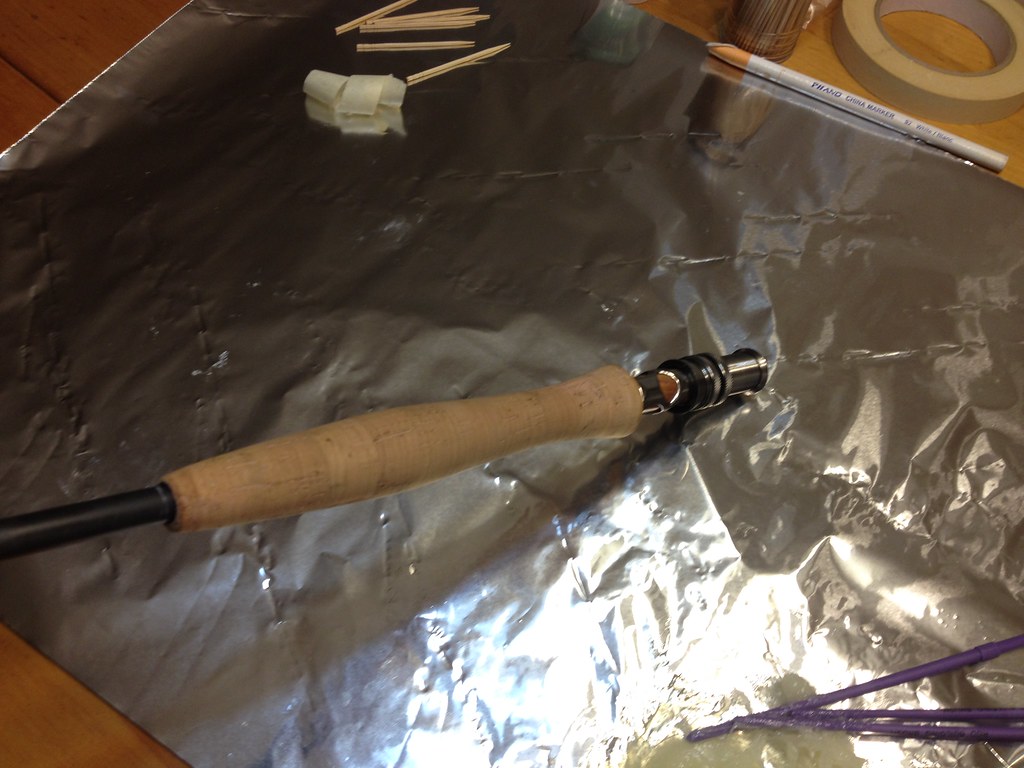
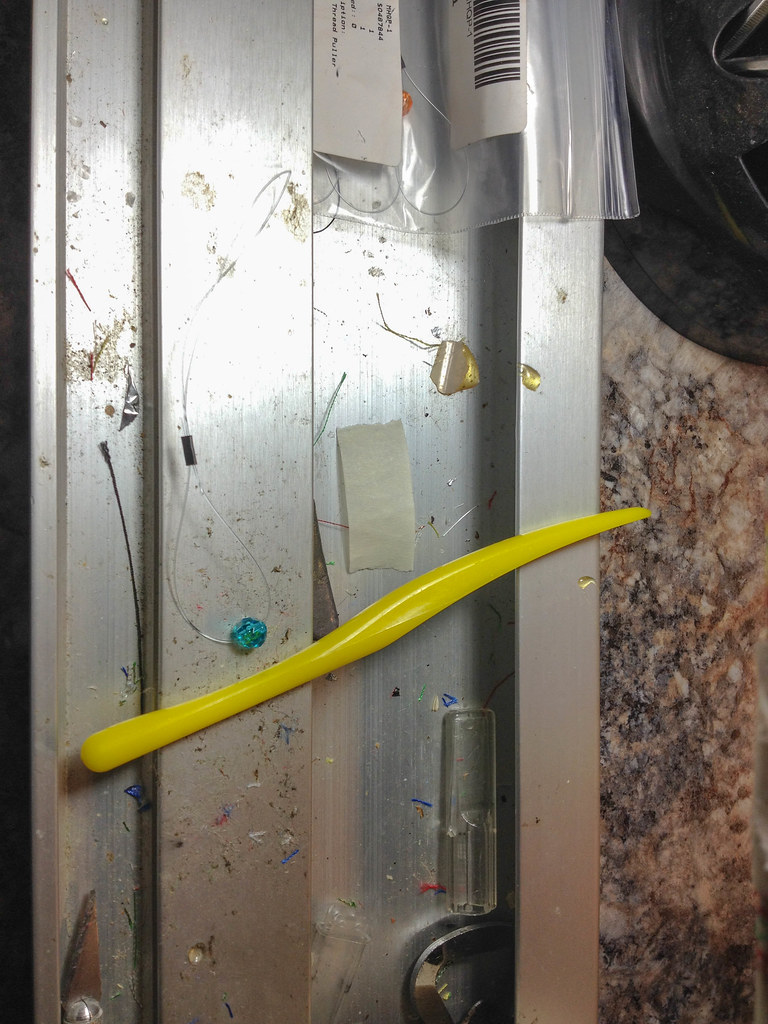
    Note the cork grip has a recessed opening on the reel seat side. This cork grip will mate up with the reel seat, covering the top section of the reel seat with cork in a clean manner. The two basic tools to ream out your cork grip to fit the blank. Start with a ROUND metal rasp, and work the sanding strokes from the bottom of the cork grip. Sanding from the reel seat side will help keep the upper grip hole side nice and tight against the blank. Sanding can and does widen the opening of cork, EVA and wood on grips. As you sand, periodically stop and slide the grip down on the blank for fit. Do not force the cork down hard and do not get carried away cutting away huge chunks of cork with a super coarse rasp. You can tear up a cork grip pretty easily. Always support the cork as you work it, holding it in circumference with your hand, as you work the rasp. As you near the optimum fit size, you can shift over to some 60 grit sandpaper and work the final sanding down to a snug fit. Don't force the grip down tightly and don't oversand and leave it too loose either. It's better to be a bit loose than tight....2 part epoxy resin will seal this grip tightly to the blank in an upcoming step.


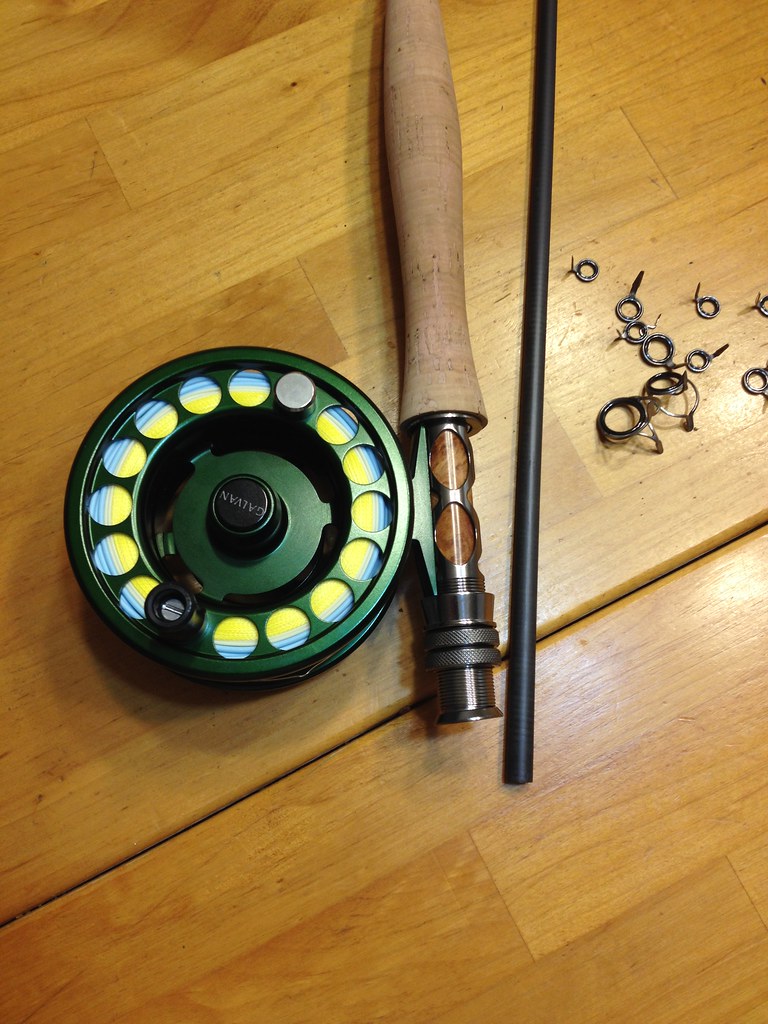
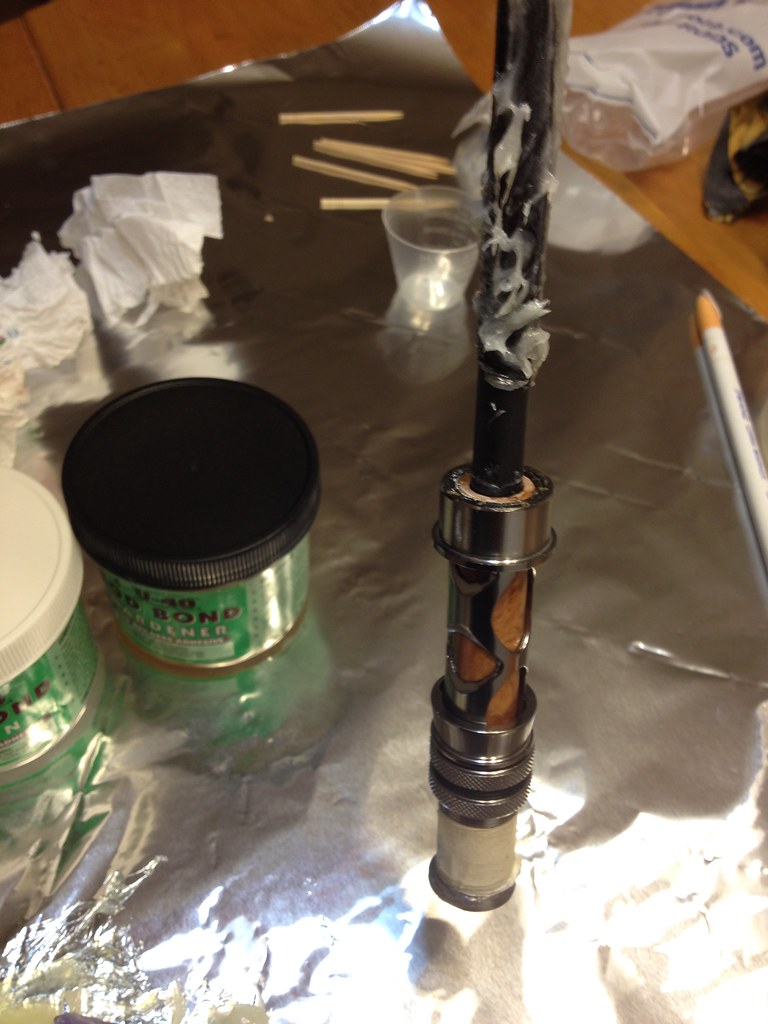
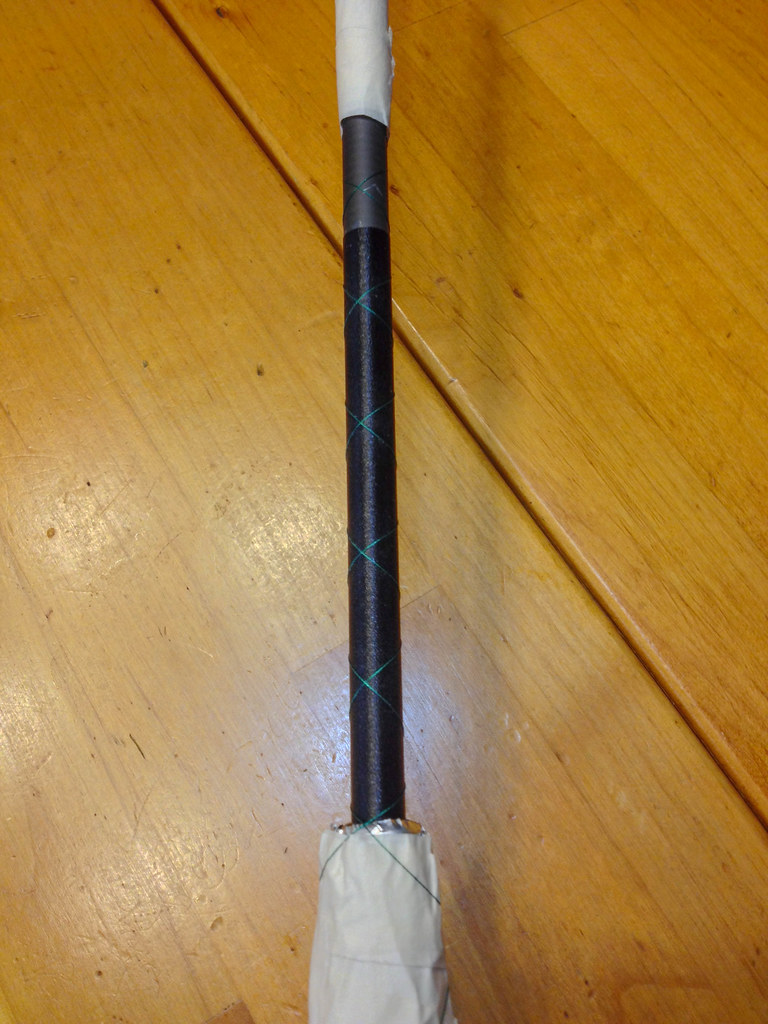
    I probably sanded for 80 minutes to get this grip down where it needed to be. I added the reel seat, butt cap and tossed the reel on for a quick fit, pre glue and pre-spine measurement. Note the recessed area of grip and reel seat in front of the reel. This particular reel seat is titanium colored aluminum and it has a nice wound look, keeping my reel seat on metal and off the rosewood below. Double locking thread knobs help hold this reel against metal and provide a super strong reel to rod base for saltwater gamefish.


    Coming next, finding the spine.

    #2
    So far so good!

    Rob, I have some pieces of fiberglass rod blanks of 3 different diameters that have cutting abrasive glued on them all around. They're all tapered, of course. I use those to ream out cork, matching the size and taper of my rod blank. They work great. A lot faster than sand paper for sure. I've had them forever. I don't know if anybody sells those anymore or not.

    Comment


      #3
      Awesome. I'm in.

      Comment


        #4
        Cool

        Comment


          #5
          I would grew that fly rods are easy to build, but wrapping those guides with A thread like most builders use will frustrate you some times. Looking good! I love a nicely built fly rod.

          Comment


            #6
            Nice!

            Comment


              #7
              This has me thinking I want to try the same. Should I start with a cheap kit to learn techniques or should I buy a cheap blank and figure out what components I will need? I've never done this before, so I'm not real sure where to start. Also, what are the needed tools to do this? Thread holder and a table edge?

              Comment


                #8
                Finding the blank's spine. There are many different ways to do this, some use tools and others like me, simply feel the blank in hand, spinning it against an edge with the blank bent and loaded up against my fingers. I use my leather Ottoman foot stool and stick one end of the rod blank along the bottom edge of the foot stool. Sitting on my couch, with the opposite end in my hands, I bend the blank upward and spin it in my fingertips, feeling for the spine. I mark the spine side with a white China Marker and then change ends, and do it again, verifying the spine at both ends, is in fact, the true spine of the rod.

                Once I find the spine, I will roll the blank over 180 degrees and mark the belly side. From these white marks, I can then orientate my guides and reel seat to match the belly zone I'm looking for, in a fly and or spinning rod blank.

                Here's the tip and butt section of my 2 piece fly rod showing my spine markings.


                After you identify the spine and belly, the next step is to start at the bottom end of the blank - the BUTT section first. Everything feeds down from the top to the bottom. As it is with all rod blanks, they taper out the further down the blank you work so it's logical you have to work from the butt upward. Grips need to slide down and fit snugly, reel seats and such, so all rod builds follow this simple rule. In the case of this fly rod, my reel seat is the first order of business since it's the first component at the butt end.

                You must lightly sand the rod blank to roughen up the surface for better glue adhesion. I use 300 grit automotive sandpaper (dry) to do this.

                First slide the reel seat down onto the blank into it's final resting spot, and take your China marker and mark the top end of the reel seat. Then slide your cork grip down and mate that up against the reel seat and mark the top end of your cork grip with China Marker on the blank. This will give you two points of reference for orientation and placement after you sand.

                Sand the blank lightly, roughing it up just enough to help with the glue's adhesion. After you finish sanding, wipe the dust partials off with alcohol on a paper towel. Slide the reel seat and mark it again with the China Marker as well as the cork grip. You now have two references for where you need to glue both components.

                Note the strip of masking tape, just above my mark for the cork grip. This protects this part of the blank during my rough up sanding process. Just a preventative measure to keep the exposed blank, above the cork grip, glossy with factory finish.


                Before you glue the reel seat onto the blank, you must eyeball your belly spot and line the reel seat exactly in line with this mark. Note on my reel seat, the top hood area has a small line. This is center point of my reel seat hood and it has to be in line exactly with my center mark on the blank. The little China marker line is just to the right side of the glare on my reel seat.


                Most reel seats are wider than the blank's outside diameter. Don't worry if your reel seat is too wide to fit snugly, a good quality masking tape, wrapped around the blank at periodic points of the blank, where the reel seat will sit, will provide a snug holding point for the reel seat, as well as adding pockets where the 2 part glue can soak and grip all as it dries. My fly rod reel seat fits perfectly in the top section but has a gap at the butt, which required a bit of masking tape build up, to firm it up near the butt.

                Mix the 2 part resin exactly half and half as per the instructions. I use a super slow drying ROD BOND U-40 2 part resin system, made specifically for fishing rod blanks. Do not use super fast cure 2 part resins. They setup too fast and when dry, become stiff and brittle. U-40 is bendable and it's designed to grip and hold with a flex and bend-ability specific to fishing rods.

                I ran out of wood sticks to stir and need to hit the hobby shop for some more mixing sticks. Had to use a few disposable paint brushes here to mix this evening.


                In this image, I added a huge glob of mixed resin onto my rod blank in the reel seat area, and slid it down into position. Also note, I have masking tape covering my real seat threads, keeping them clean from epoxy spillage, just in case I get some onto the threads. The reel seat butt cap is attached, reel seat slid in place stopping at my China marker mark. The glue above the reel seat, is now ready for the cork grip and I will slide it down and mate that against the reel seat, wiping any excess glue quickly from all exposed areas. A slow cure glue will help you clean-up with out risk of leaving unwanted resin in areas you do not want it left in.


                And here it is, all glued up and wiped down. At this stage of the drying cycle, I will hold the rod blank firmly against my butt cap, for roughly an hour or so. I do this to keep pressure on the butt cap, so the glue and pressure within the blank, do not allow the butt cap to push out and dry, leaving a gap and or butt cap, sitting at some cockeyed angle.


                If a rod blank has a closed end, like the butt section of any two piece fishing rod typically does (the male side), gluing the butt end section closed, as the rod blank dries, develops pressures inside the blank (heat\cooling and barometric pressure changes), which can push outward, and this pushing effect then pops the end cap out during the glue drying process. The same can be said of tip guides on a closed butted blank. Always be aware of this when you close off either end of a hollow rod blank with slow cure glues.

                Comment


                  #9
                  Originally posted by LonghornTX View Post
                  This has me thinking I want to try the same. Should I start with a cheap kit to learn techniques or should I buy a cheap blank and figure out what components I will need? I've never done this before, so I'm not real sure where to start. Also, what are the needed tools to do this? Thread holder and a table edge?
                  Go visit www.MudHole.com

                  They have rod building kits as well as everything you need to get started on your custom rod build project.

                  Comment


                    #10
                    Originally posted by AtTheWall View Post
                    Go visit www.MudHole.com

                    They have rod building kits as well as everything you need to get started on your custom rod build project.
                    Thank you, sir.

                    Comment


                      #11
                      Originally posted by captainsling View Post
                      I would grew that fly rods are easy to build, but wrapping those guides with A thread like most builders use will frustrate you some times. Looking good! I love a nicely built fly rod.
                      Yes, I use A-Thread on my light tackle stuff. The only time I use a C or D thread is on surf rods and offshore rods. And this is typically used on the guide feet only. I will wrap decorative wraps and under wraps using A thread on all blanks. It looks cleaner and smoother but it can and will test the eyeballs and nerves as that blank diameter gets super skinny up near the rod tip.

                      Comment


                        #12
                        Originally posted by Shane View Post
                        So far so good!

                        Rob, I have some pieces of fiberglass rod blanks of 3 different diameters that have cutting abrasive glued on them all around. They're all tapered, of course. I use those to ream out cork, matching the size and taper of my rod blank. They work great. A lot faster than sand paper for sure. I've had them forever. I don't know if anybody sells those anymore or not.
                        You can make them and I've been meaning to do this, using some old fiberglass rod blanks to do so. I got one of the semi-retired guides I know deep into rod building here lately. He's an old-school machinist and has a few lathes out in his workshop. He made a cork reamer, using some old rod blank pieces and glued sand paper pieces, rigging this all up on his lathe's chuck. So I save my bigger grip jobs, for periodic visits to his workshop, and knock out the reaming portion pretty quickly there. Offshore EVA grips and or wooden grips need that extra horsepower to make this part of the build easier. He has the traditional lathe, with metal guide, that allows you to hold the work solidly and in line with the grit.

                        Wished I had space for a lathe, I could make good use of one.

                        Comment


                          #13
                          Thanks for posting this.

                          Comment


                            #14
                            Now begins the wrapping part of this project.

                            Here's my wrapping setup for this particular fly rod build. I use a Pacific Bay rod wrapping system, which has an electric motor for wrapping as well as drying. I'm opting to hand turn this fly blank, versus using the electric motor, so I left the 3rd base with wrapping motor in my store room.


                            Here's the entire system wrapping system, foot pedal control with wrap and drying motors.


                            I start with my decorative wraps first, on all custom rods. I save the guides as my last step in the rod's build. I won't go into extensive detail on the decorative wrap side, it's too complex to detail here and there are tons of books and online tutorials on the various styles used to create decorative wraps.

                            For decorative thread work, I lean on this product. It's made in Germany and the colors are NEON bright. This thread isn't strong enough to cover guides but, underwraps and or decorative wraps, it's perfect.
                            Thread diameter is A


                            I start my decorative wraps, wrapping a solid color under wrap on the blank, just in front of my fly rod's fore grip. I'm using black as my under wrap, and the decorative wraps will be diamonds, spaced out an exact inch over the top of the black underwrap. I measured off 4.5 inches of under wrap, allowing me to have 3 - 4 diamonds on top, just in front of the grip. This isn't necessary in a rod build but, it does add character to a rod.

                            Here's the completed under wrap.


                            Now the decorative wraps begin. I cover my grips with aluminum foil first, then cover that with masking tape. I also do the same on the rod blank, in the areas were I make my turns and tie downs between passes up and down the blank. This keeps my threads off the blank and cork, and allows me the ability to cut them free without cutting the rod directly on both ends, when it's time to cleanup.


                            Here's a close-up view of my first pass. The marks have to be exact and in line where you want them to lay down on the rod. I start on the grip side and spin a few times there before wrapping down onto the blank. I follow my spacing marks along the blank getting to the top, spinning a few times above with a tape hold down, and then turn back down the blank following my pattern.


                            One thread at a time, the green pattern starts to lay down.


                            Then I add my second color, and continue on my pattern


                            Then the third and final color gets added...hours into the madness.


                            After I am satisfied with my decorative pattern, I apply a good coat of Thread Sealer\Preserver. This stuff is made in Driftwood Texas.....the first folks in the custom rod industry to provide, two part resin based thread wrapping coatings, for custom rod builders - FLEX COAT. Been using this stuff since the 1970s.


                            Tools used for thread work. The yellow plastic item is a burnishing tool, which helps with tightening and smoothing thread wraps. The other blue BB with mono string is a thread puller tool. Used to pull your threads up under to hold, at the finishing point of your wrap.
                            I use a baby sized fingernail clipper to clip the thread ends tight to the blank.
                            And an assorted set of steel picks, that have needle points, that help with moving and tightening threads after they have been wrapped down on the blank.


                            I will cover the decorative tie down and thread clean-up steps next. Then we will move on to guide placement and wrapping guides.

                            Comment


                              #15
                              When wrapping decorative patterns and working guides and tighter areas of thread work, I opt to hold my thread spool in my left hand and spin the blank in my right hand. This is truly hand wrapping a rod and literally 98% of my rod build work, is all hand held.

                              When wrapping large sections of under wrap, like surf rods and or offshore trolling rods, where sections of solid thread lay down inches upon inches over the blank, I use my electric wrapping motor. The electric wrapping motor and a thread spool holder, that has adjustable tension settings, makes quick work of long tedious sections of thread.

                              The power wrapper doesn't work as well, with smaller blanks and or sections of thread work, where you need to be precise and meticulous (decorative) and or smaller and multiple sections of various colors. These are better suited to be wrapped by hand with the rod held at all times with one hand for tension and control.

                              Comment

                              Working...
                              X