I know there are better ways than this to build a habitat but this is what I had available at the time. This particular habitat was for a whitetail skull and the process was as follows:
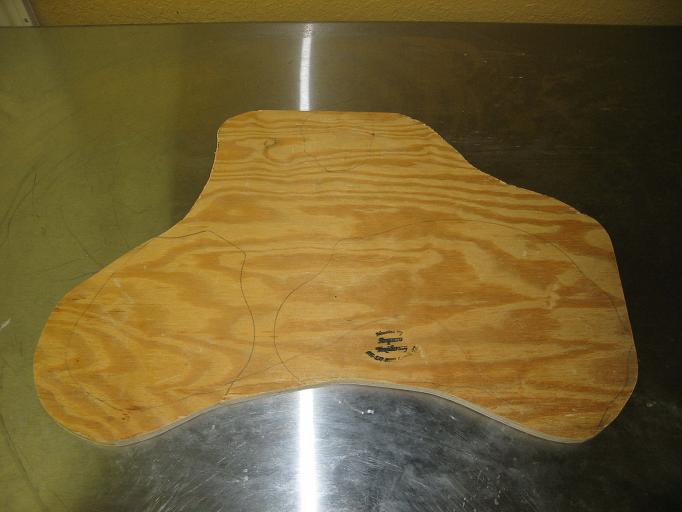
First I cut a piece of 1/2 inch plywood that followed the basic shape of the skull and post.
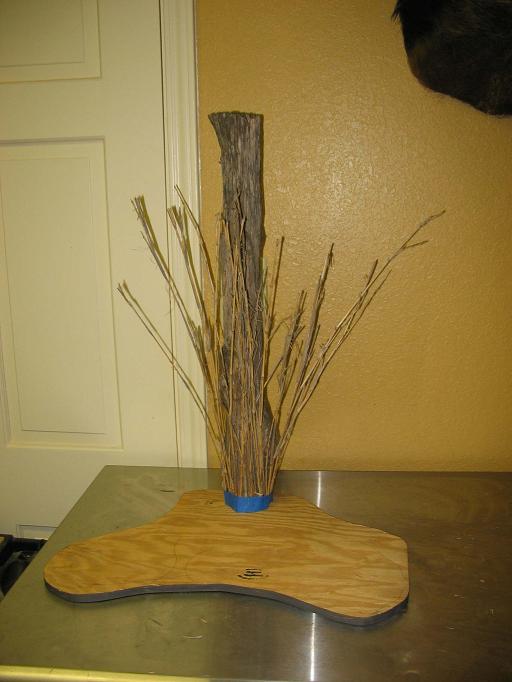
Next I attached the fence post with drywall srews.

Once the post was in place, I positioned the grass around the post with tape to get a basic layout before attaching it permanently.
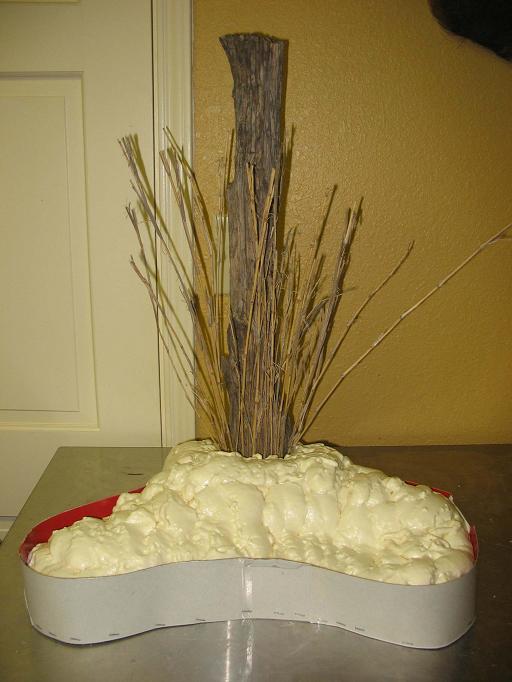
After the post and grass were in place, I built a dam around the base and filled it with expanding foam.
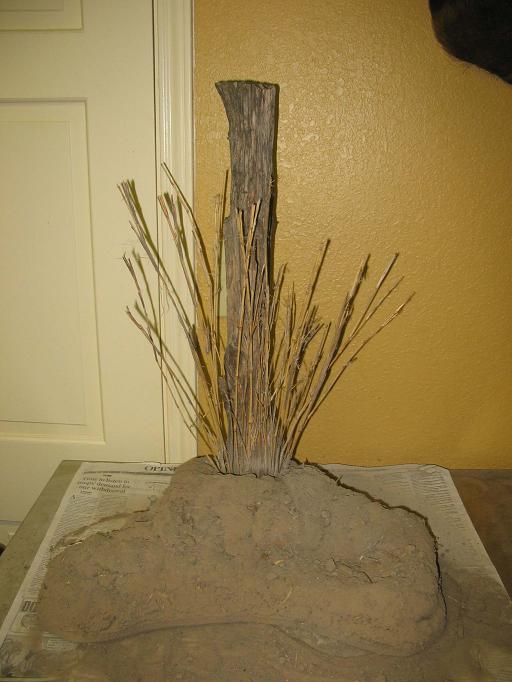
After letting the foam dry over night, I smoothed the foam with a rasp and spray painted the whole thing with a sand color. Next I sprayed Elmer's spray adhesive onto the base and sprinkled dirt over it in several layers. Finally, once the dirt dried, I sprayed more adhesive and added mesquite leaves before spraying the whole thing with a matte sealer.
The last step was to attach the skull and post pictures on Texasbowhunter.com.

As stated earlier, this is not the only way to approach a project of this nature. Typically, the base is constructed from a high quality two part foam and a 50/50 mix of Elmer's or wood working glue and the dirt. I used spray foam out of a can and spray adhesive because it's what I had at the time which I think is more in line with the entire D-I-Y spirit. If you decide to take on this project; good luck, have fun and don't forget to post the pictures.
First I cut a piece of 1/2 inch plywood that followed the basic shape of the skull and post.
Next I attached the fence post with drywall srews.
Once the post was in place, I positioned the grass around the post with tape to get a basic layout before attaching it permanently.
After the post and grass were in place, I built a dam around the base and filled it with expanding foam.
After letting the foam dry over night, I smoothed the foam with a rasp and spray painted the whole thing with a sand color. Next I sprayed Elmer's spray adhesive onto the base and sprinkled dirt over it in several layers. Finally, once the dirt dried, I sprayed more adhesive and added mesquite leaves before spraying the whole thing with a matte sealer.
The last step was to attach the skull and post pictures on Texasbowhunter.com.
As stated earlier, this is not the only way to approach a project of this nature. Typically, the base is constructed from a high quality two part foam and a 50/50 mix of Elmer's or wood working glue and the dirt. I used spray foam out of a can and spray adhesive because it's what I had at the time which I think is more in line with the entire D-I-Y spirit. If you decide to take on this project; good luck, have fun and don't forget to post the pictures.

Comment