Announcement

Collapse
No announcement yet.

knife build along

Collapse
X
 
  • Filter
  • Time
  • Show
Clear All
new posts

    #76
    [ATTACH]42061[/ATTACH]

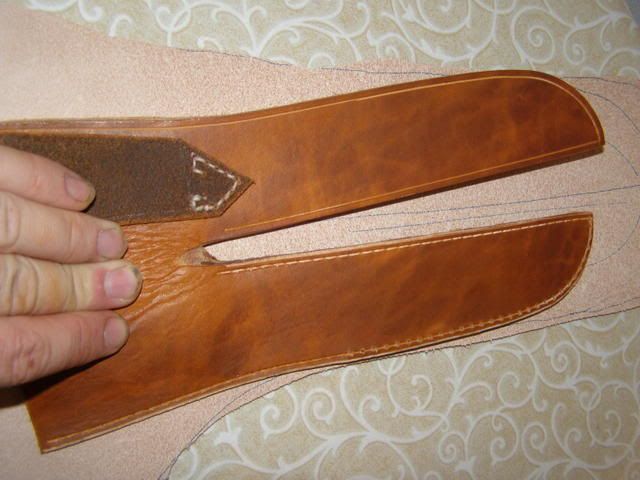
    sorry for the horrible pic. 0-1 steel at1/8 inch thick blade with stabalized california buckeye burl, two stainless pins and a lanyard hole
    Last edited by theluckyhunter; 06-17-2008, 10:21 PM. Reason: im a ninja

    Comment


      #77
      Looks good Unlucky the handle treatment is close to what I have going on.

      The next several steps are handle shaping. For the most part I used the grinder. When I first started I had a stash of files, small rasp, and rolls of sandpaper to do the shaping.

      In this picture I've cut the excess pins off with the bandsaw. You can use a hacksaw. If using power tools one thing to watch for is heat. You have epoxy holding everything on and heat will break the bond. I've also ground away all the excess handle material.


      In this next picture you're going to notice how I started rough shaping the sides of the handle. I matched up the angle with the bolster and ground it down. On the back I narrowed it and made it thicker right in the palm of a hand which I tried to show in the picture. This is a common handle I make that gets alot of compliments as far as feel.

      I used a grinder it's easily done with a rasp or files with the knife mounted up in a vise.

      Bottom view


      In this picture you can see I've started rounding the corners off. I'm doing this all with 100 grit belts.


      If you notice in the finger choil it's rounded to make a comfortable fit. When we left off yesterday I still had some excess bolster material there. To do that and round my corners I split my belts with a razor blade and use the grinder like so.


      You can use shop rolls of sandpaper or cut sandpaper in strips and use the shoe shine motion. ONe thing to watch is where handle material meets bolster material. THe wood will wear away faster creating a sharp junction between the two. It just takes some practice to blend it in.


      Progress through the grits. Do 100, 220, 320, and then 400. Sand everything to one grit then go to the next. Do the spine, bolster tops, sides of the bolsters and sides of the handles in one grit before moving on to the next. One thing I did not take a picture of was sanding the sides of the handle. I use the same sanding block I hand sanded the blade with. Don't just sand the bolster then just the handle it will creat dips. Use a hard backing like my block and go from the bolster onto the wood in one smooth motion. Let me know if that does not make sense and I will go take a picture.

      I do have a picture of the knife clamped up getting ready for me to put the final finish on.


      Here's another where I started the hand polishing at 400 grit. For the finger area I used sandpaper wrapped around a dowel rod. I take all my polishes in the same direction as the blade.


      Some tips
      Make sure you sand the pins too
      Use a sanding block because if not pins and bolsters will not be very flush due to the wood being softer than the metal
      Do not use a cutting fluid or lubricant like wd40
      Between grits I use tung oil and 0000 steel wool to clean out the pores of the wood
      If using a thong tube like I did on the end of the handle like I did, take a drill bit several times bigger than the hole and by hand turn it at the opening of the hole. This will take out the burrs.
      A couple of things alot of new makers do I did it and it was pointed out to me was that they/we make the handles too big. It took me forver to get confident enough to take the handles down to the right size.
      Also they tend to leave them too blocky. Round those corners off they are uncomfortable.


      Once finished I apply Tung oil and then Ren Wax on the handle. I apply the tung oil and then let it dry and buff with the steel wool. Once that's done I apply the Ren Wax and buff it on by hand. If the handle material is not stabilized I will apply roughly 20 coats over the period of a few days. If it's stabilized one or two coats does it.
      Last edited by doublearrow; 06-18-2008, 09:57 PM.

      Comment


        #78
        Finished...well except for edge, finger smudges on the blade, and the sheath. I have to make a flight to Austin in the morning for work so I'll have to get that done next week if ya'll are interested in seeing that.


        Last edited by doublearrow; 06-18-2008, 09:57 PM.

        Comment


          #79
          looks good amigo, what did you use for thy lanyard hole? it seems like it is really thick metal. the only thing i can say is that i like to take my handles to 800. but that knife looks PERFECT

          Comment


            #80
            Originally posted by theunluckyhunter View Post
            looks good amigo, what did you use for thy lanyard hole? it seems like it is really thick metal. the only thing i can say is that i like to take my handles to 800. but that knife looks PERFECT

            Thanks unlucky. I used 310 stainless for the thong hole. I usually take my working knife handles to 400 grit for a more "grippy" feel. When I take them to 800 they're like glass and cleaning something and getting blood on your hands can make a slippery knife even more so.

            Comment


              #81
              sheath done. With all the stuff hittin the fan like it is at work I didn't have near the time I needed to take build along pictures of the sheath, but I have another identical knife I will do when I get to it.

              Here it is. I have to finish the edge coat and put an edge on the knife.


              Comment


                #82
                Great looking knife. Excellent thread.

                Thanks for sharing!

                Comment


                  #83
                  Ryan,

                  I was talking to my elk hunting partner out here in Cali, and he said your post has been linked to a knife-building web site (I don't know which), and he saw my posts on it. How strange is that?

                  Again, great work and incredible talent.

                  Comment


                    #84
                    Awesome read & nice work.

                    Comment


                      #85
                      Thanks for sharing. great looking knife.There is more work and time in a knife than I thought.

                      Comment


                        #86
                        Originally posted by Bill in San Jose View Post
                        Ryan,

                        I was talking to my elk hunting partner out here in Cali, and he said your post has been linked to a knife-building web site (I don't know which), and he saw my posts on it. How strange is that?

                        Again, great work and incredible talent.
                        I did post it on a knife site where I learned how to make knives, but I have seen it posted on several others after people read it. I tried to take it more indepth than most tutorials and from that I guess it's getting passed around way more than I expected. But still strange how much the people intertwine on the internet. Thanks for the compliments guys.

                        Comment


                          #87
                          Originally posted by Bill in San Jose View Post
                          Ryan,

                          I was talking to my elk hunting partner out here in Cali, and he said your post has been linked to a knife-building web site (I don't know which), and he saw my posts on it. How strange is that?

                          Again, great work and incredible talent.
                          The buyer also posted the thread on corvetteforum.com, which is how I found this website. Sweet knife, looks like high quality work.

                          Comment


                            #88
                            Instant classic!

                            Comment


                              #89
                              Incredible workmanship! It is quite a journey from start to finish. I will have to purchase one in the near future.

                              Comment


                                #90
                                Originally posted by Alaskan View Post
                                The buyer also posted the thread on corvetteforum.com, which is how I found this website. Sweet knife, looks like high quality work.

                                Be careful around here it's addicting.

                                Comment

                                Working...
                                X