
There's more than one way to skin a cat. This is just one method I learned from a Scott Kelby Book. This is for Photoshop CS3 but I'm sure you would be able to do this in Elements or older versions of Photoshop. I'd be interested to know.
How to do it:
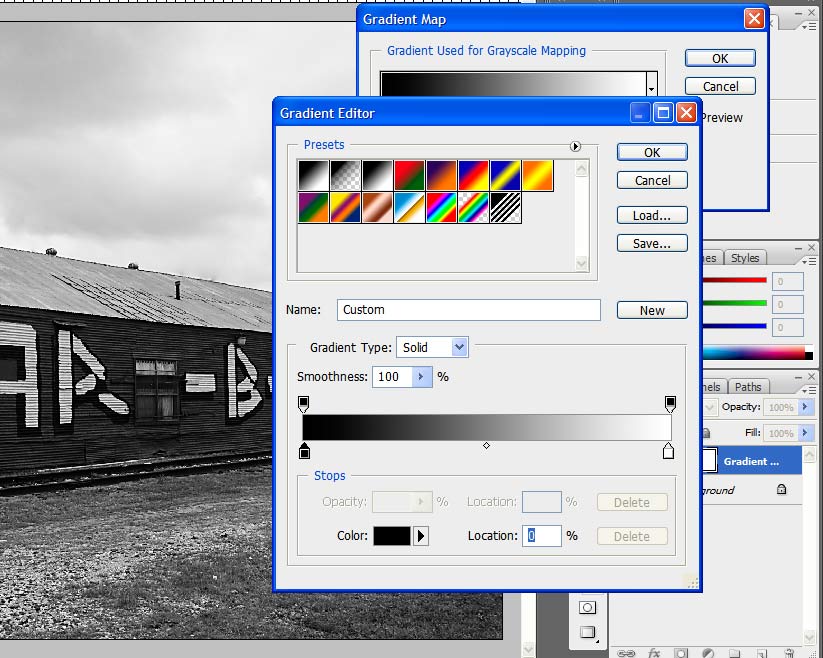
Open up color photo that you want to convert. Hit the letter D to set your foreground to black. Then, Click on the add fill or adjustment layer and then click on Gradient Map.

The Gradient map dialog appears-just click done. You can be done at this point or, you can double click your layer thumbnail and then double click in the middle of the gradient map. This opens the gradient editor. Just slide the sliders back and forth until you get the contrast you are looking for.
Let me know if I need to add more details to understand it. I tried to break down what Kelby does in 4 pages, to a couple of paragraphs.
How to do it:
Open up color photo that you want to convert. Hit the letter D to set your foreground to black. Then, Click on the add fill or adjustment layer and then click on Gradient Map.
The Gradient map dialog appears-just click done. You can be done at this point or, you can double click your layer thumbnail and then double click in the middle of the gradient map. This opens the gradient editor. Just slide the sliders back and forth until you get the contrast you are looking for.
Let me know if I need to add more details to understand it. I tried to break down what Kelby does in 4 pages, to a couple of paragraphs.
Comment