Announcement

Collapse
No announcement yet.

knife build along

Collapse
X
 
  • Filter
  • Time
  • Show
Clear All
new posts

    #61
    Dovetailing jig if you don't have a grinder.

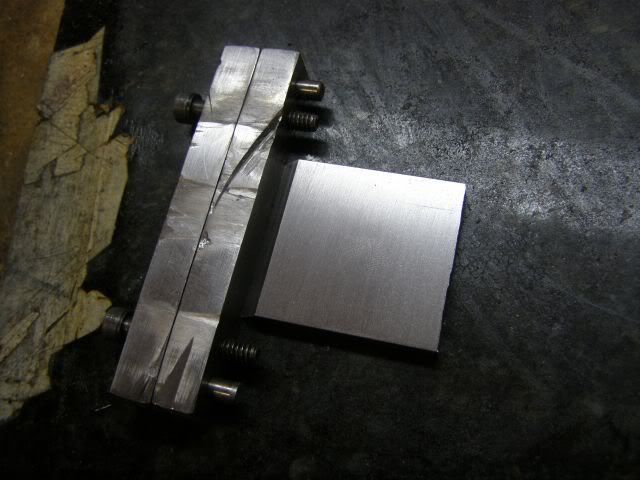
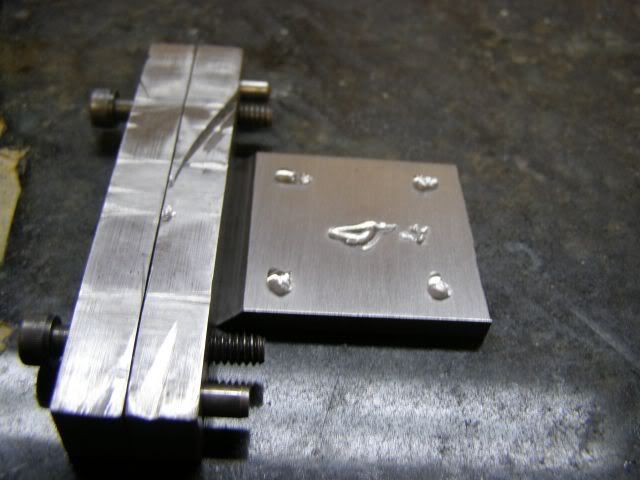
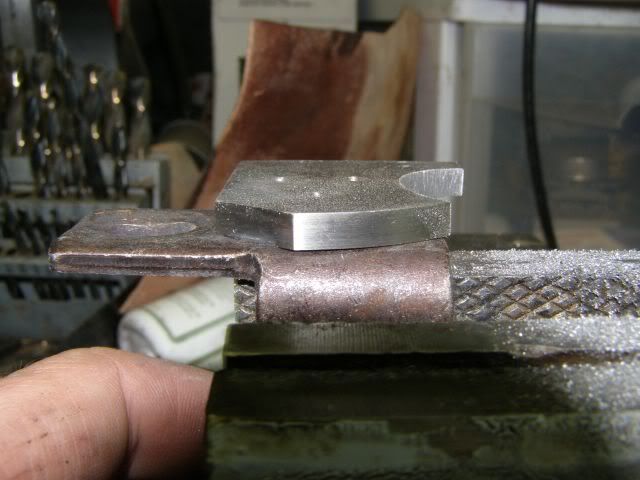
    You need a flat surface like the granite block I have. A piece of angle iron, sandpaper, c clamps and patience.

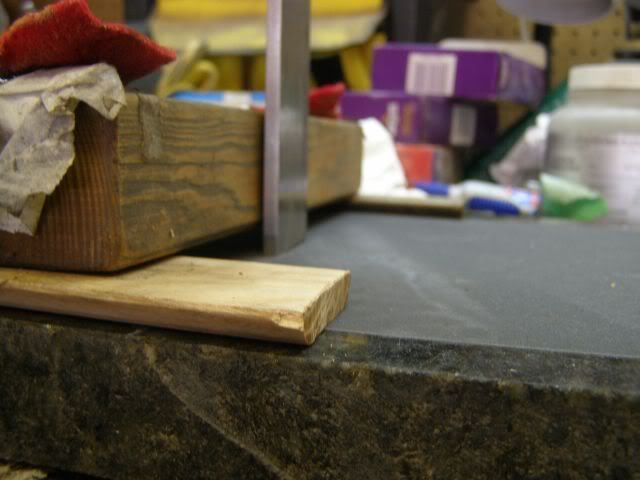
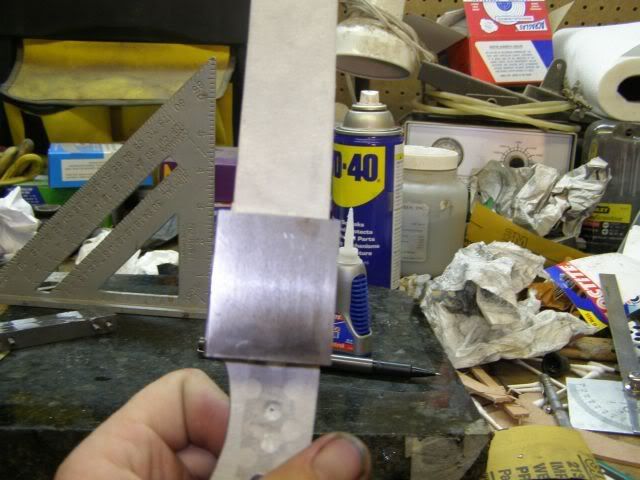
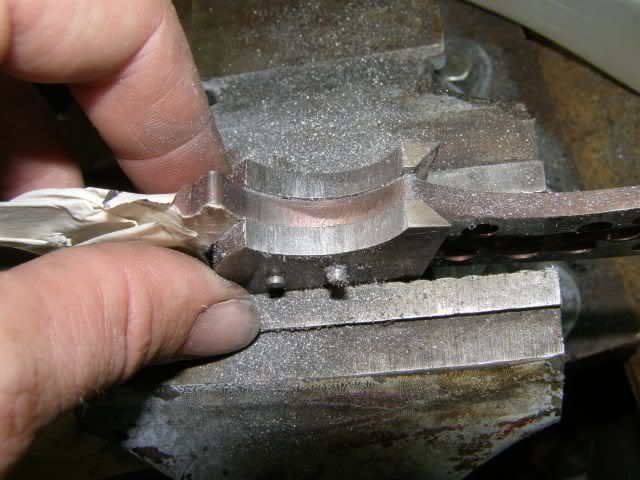
    I did not have a piece of angle iron so I used a large block of wood. You'll get the idea with these pics hopefully. In this picture I have a square set up. With this set up this is the easiest angle. The 2 pieces of red felt were my way of marking where to c clamp this all down. Once you clamp this all down you don't want to undo it. My set up I'd have to keep cutting sandpaper to slide underneath because I couldn't slide it under the blocks of wood.


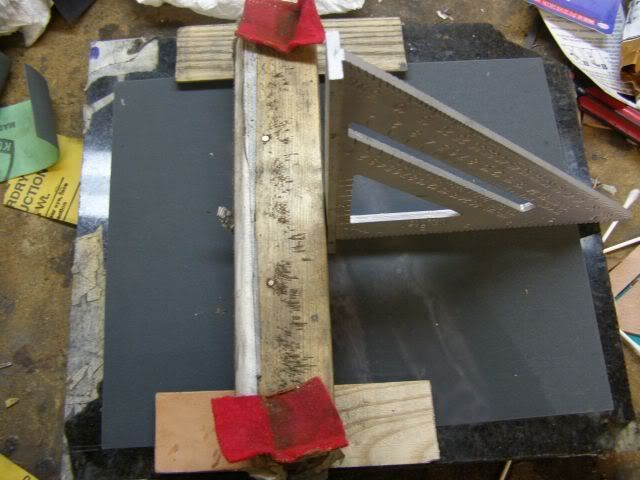
    YOu could put some shims underneath to change the angle use a protractor to get the angle you want.
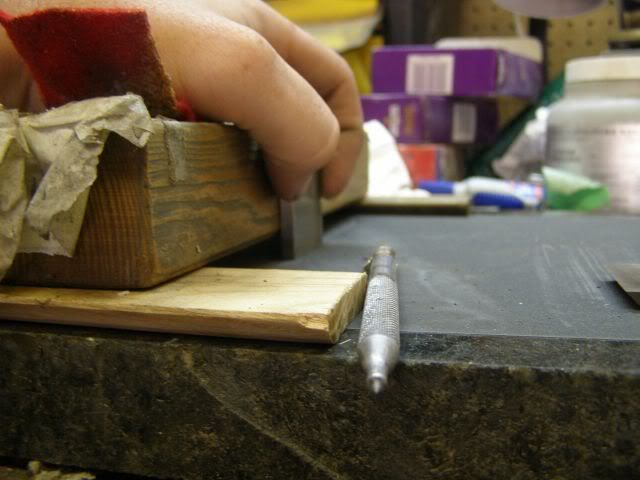
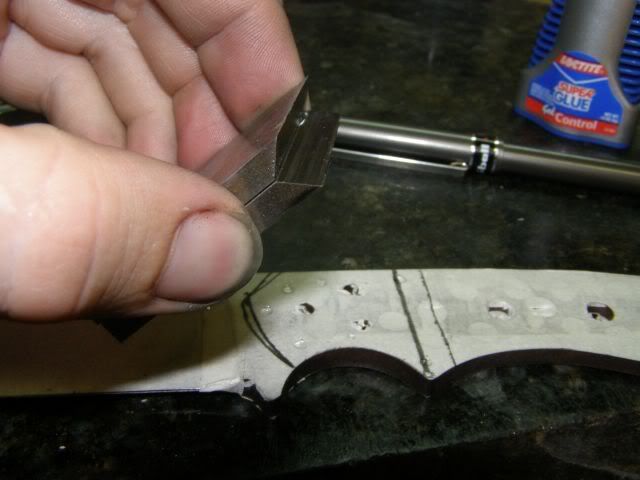
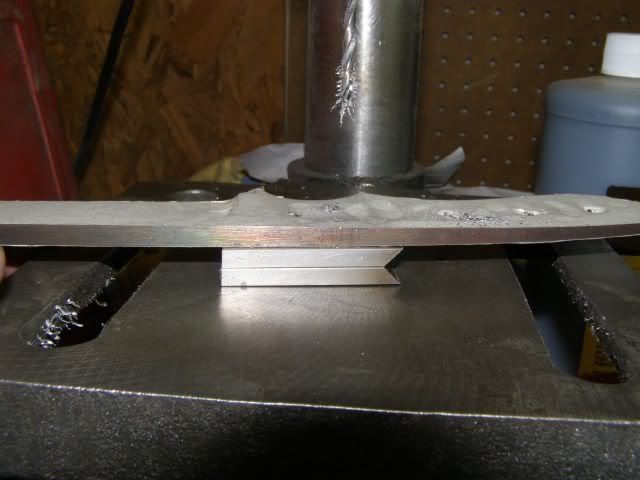
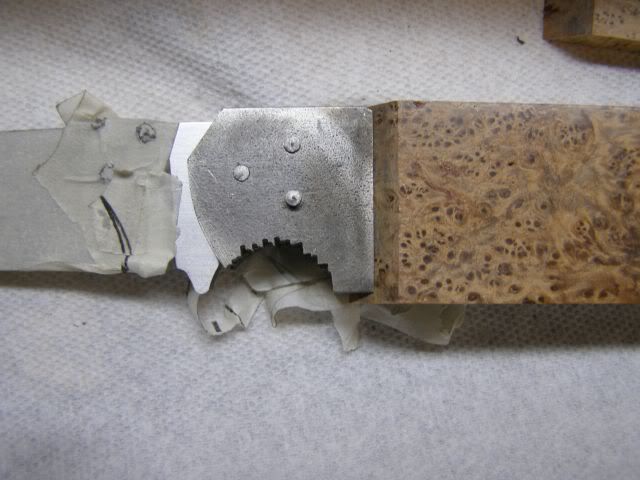
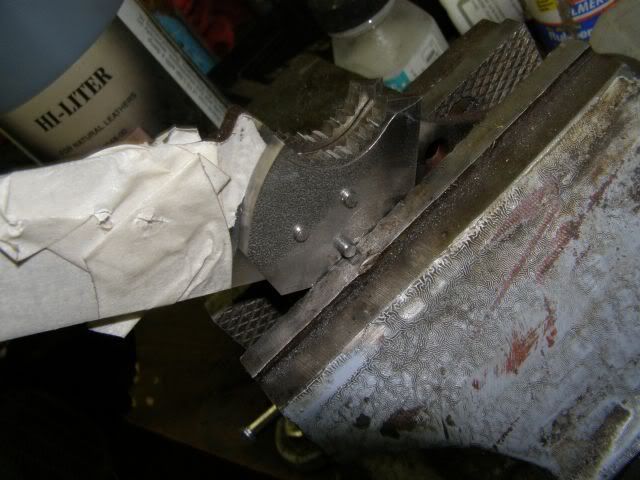
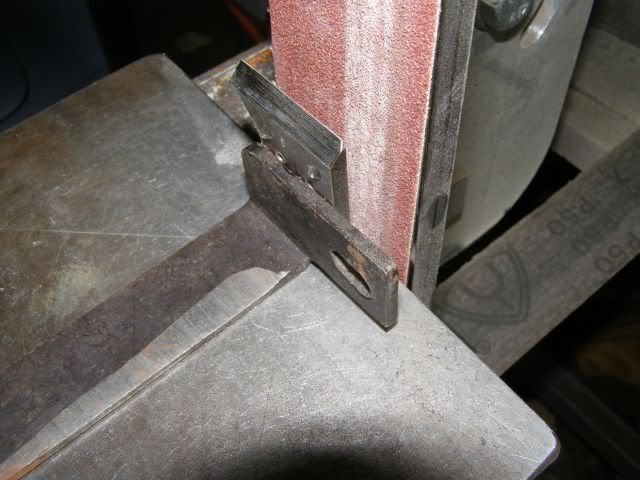
    In use


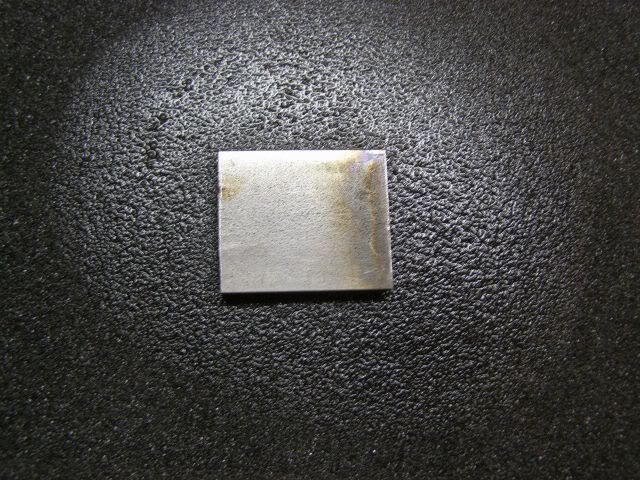
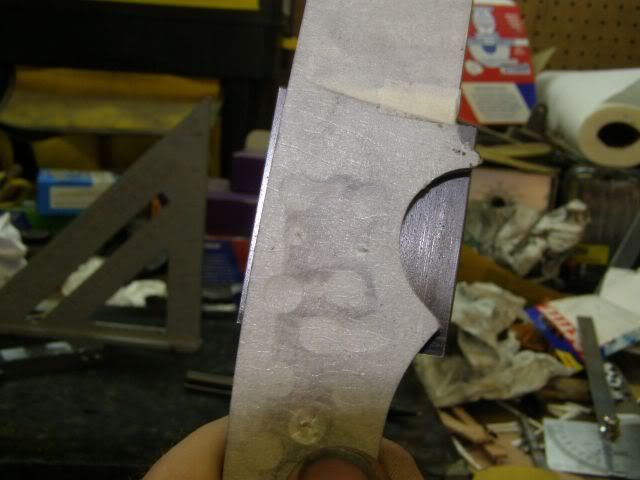
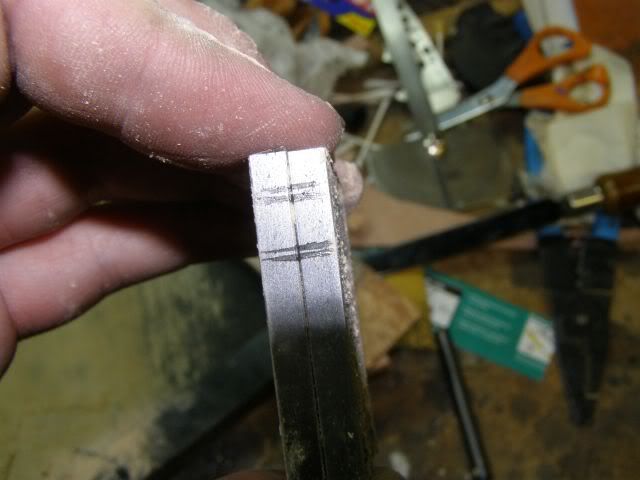
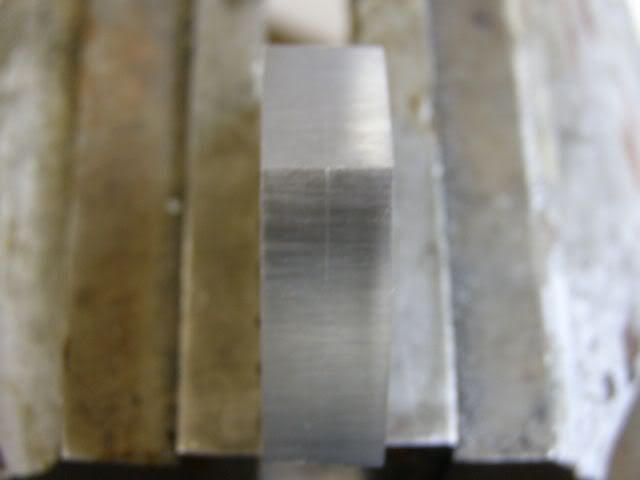
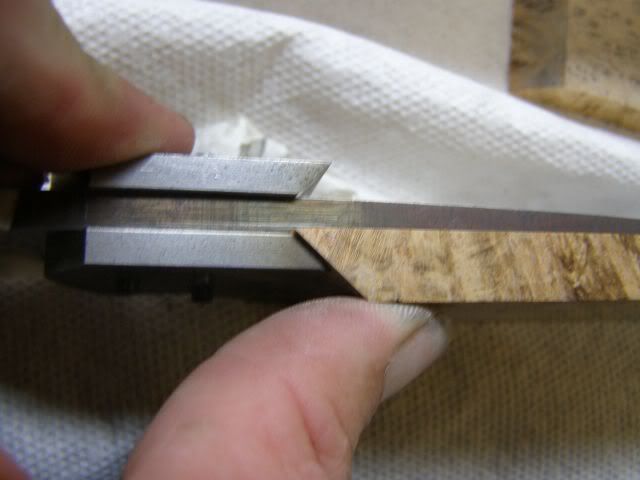
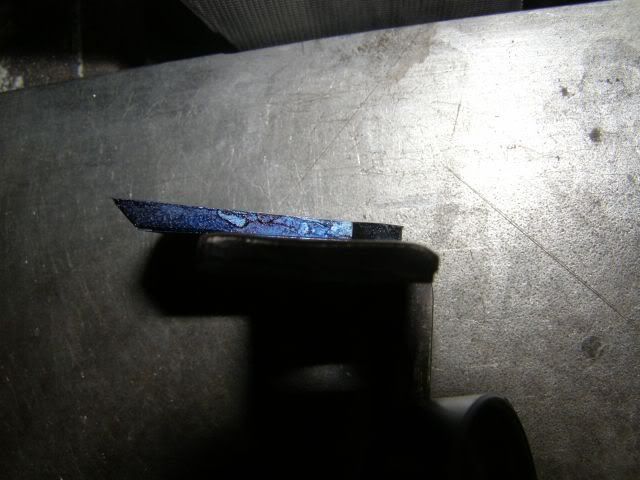
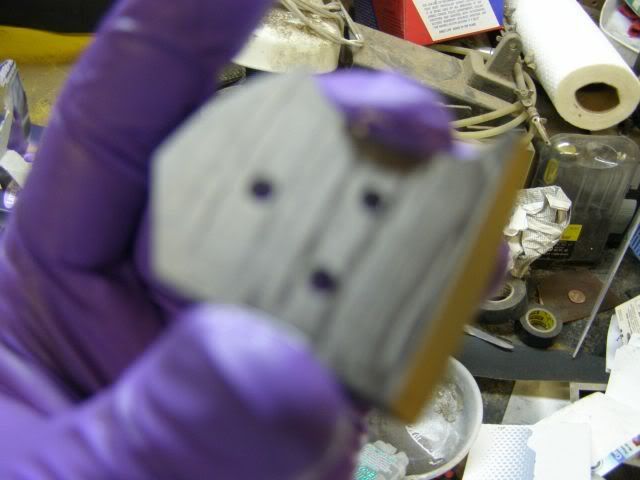
    Start running it back and forth and you'll start seeing high spots.


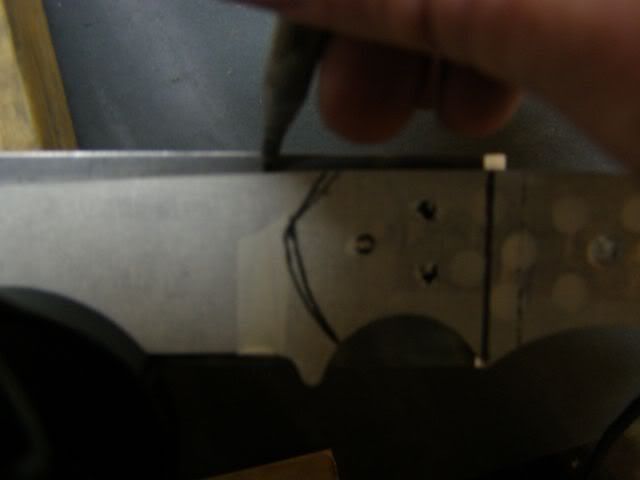
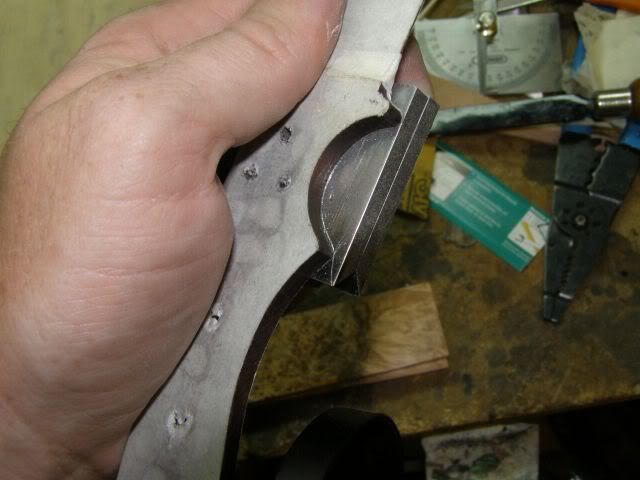
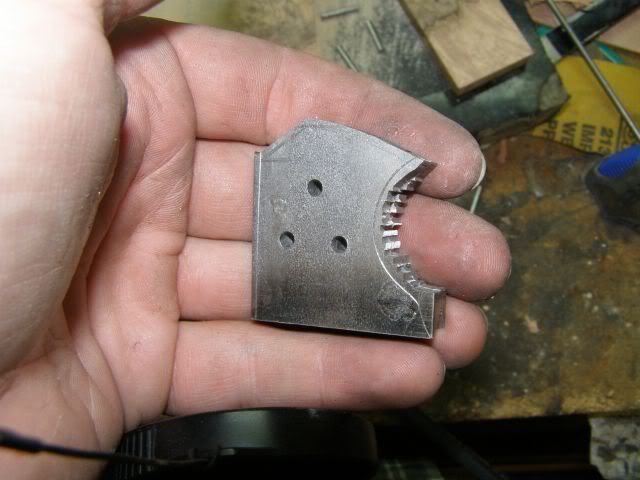
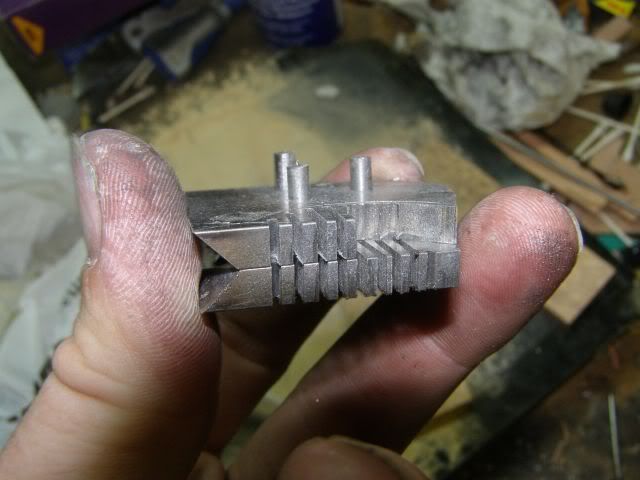
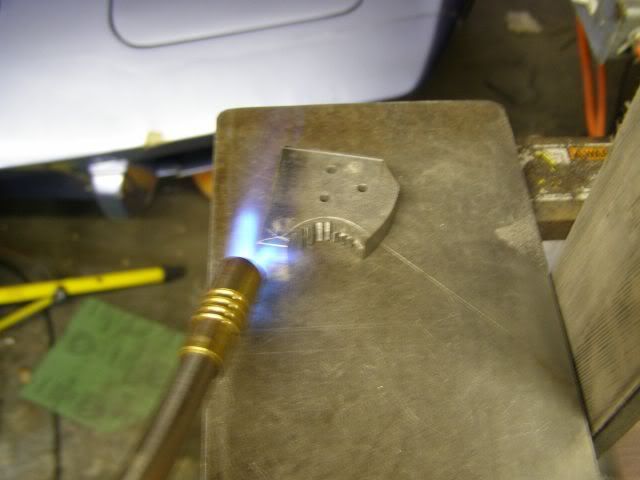
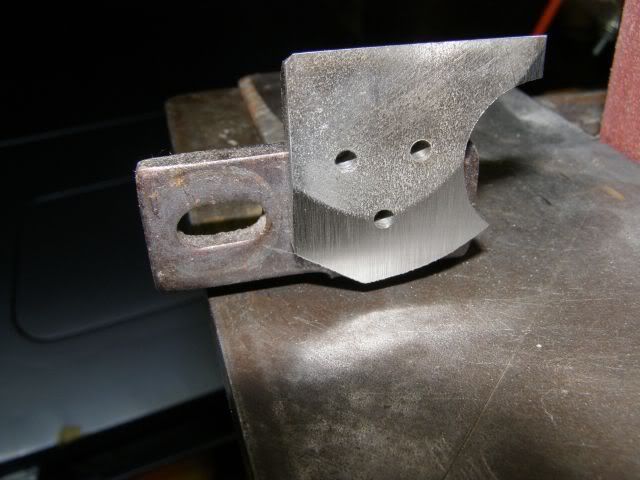
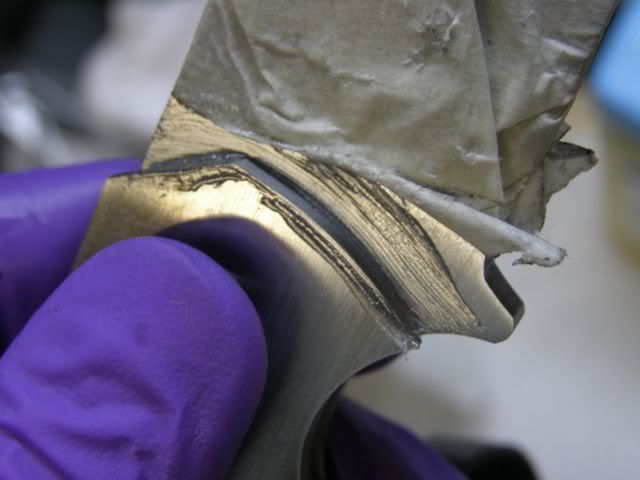
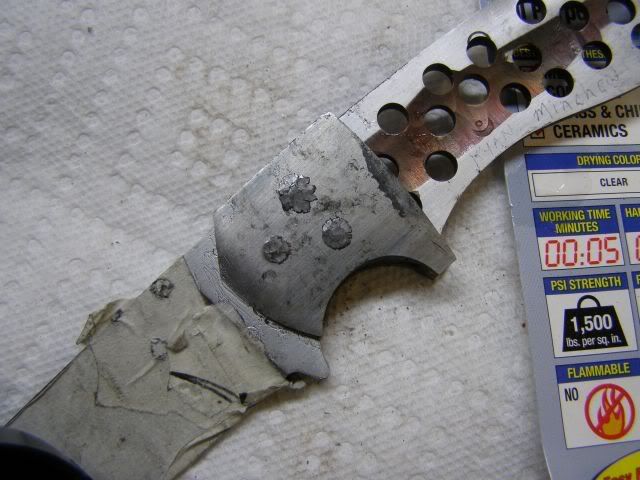
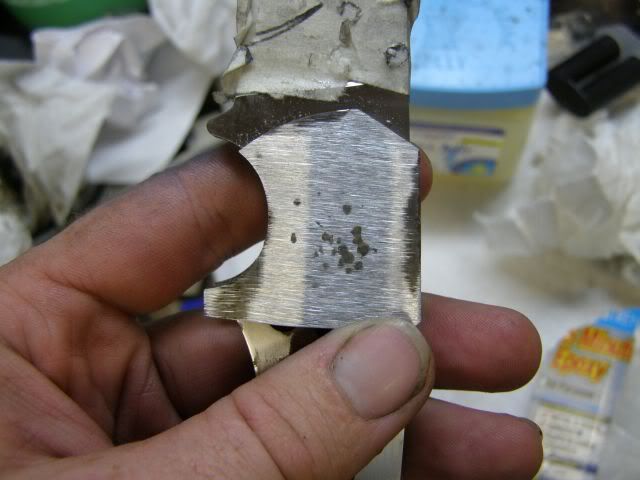
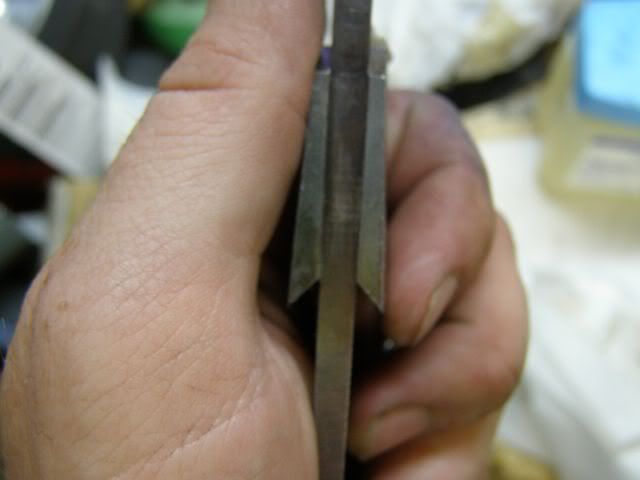
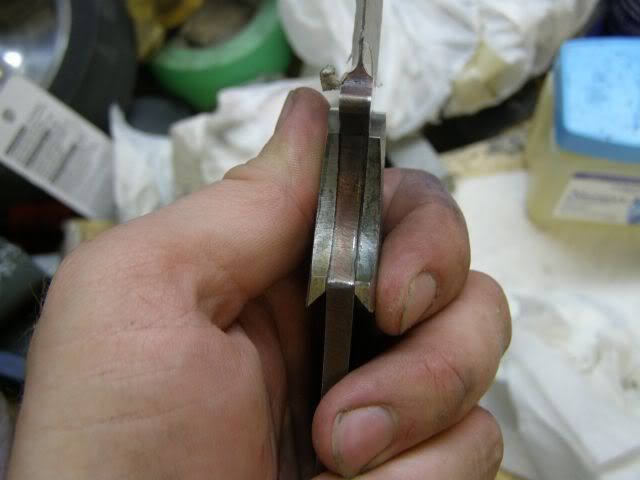
    If you decide to dovetail the angle remove the bulk amount of steel with a file.

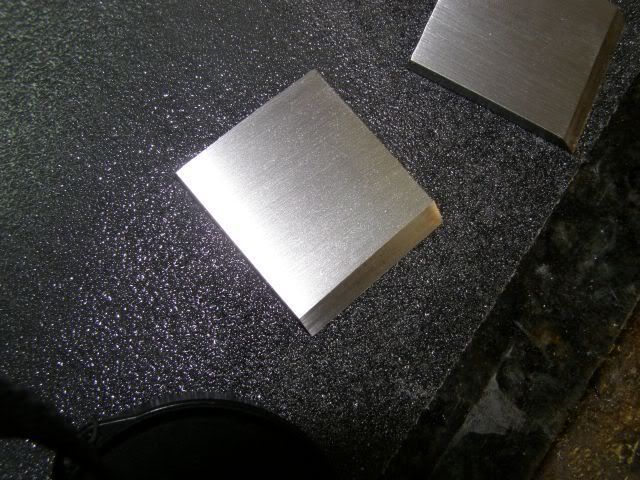
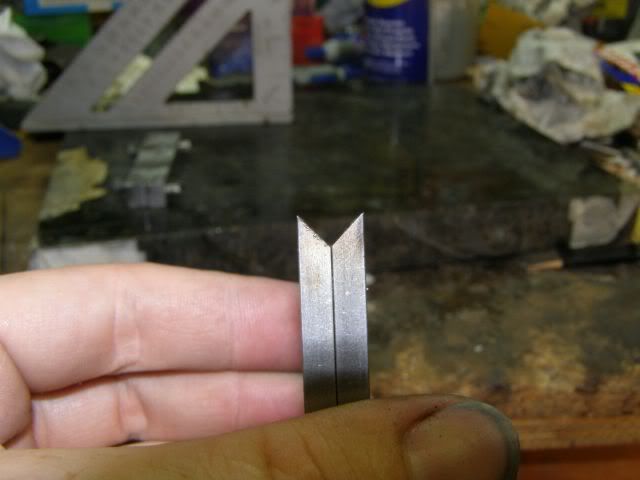
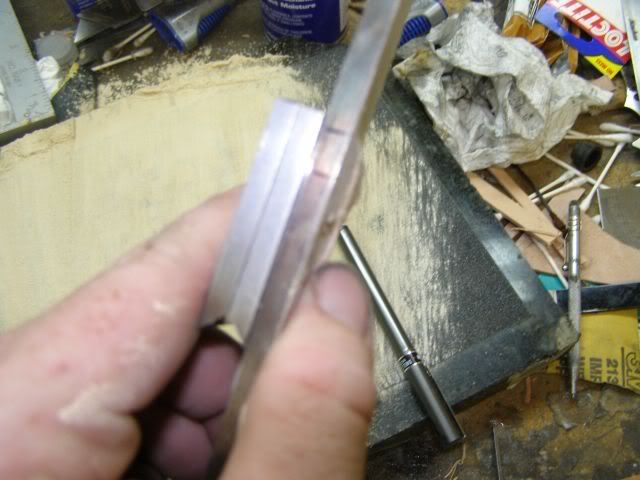
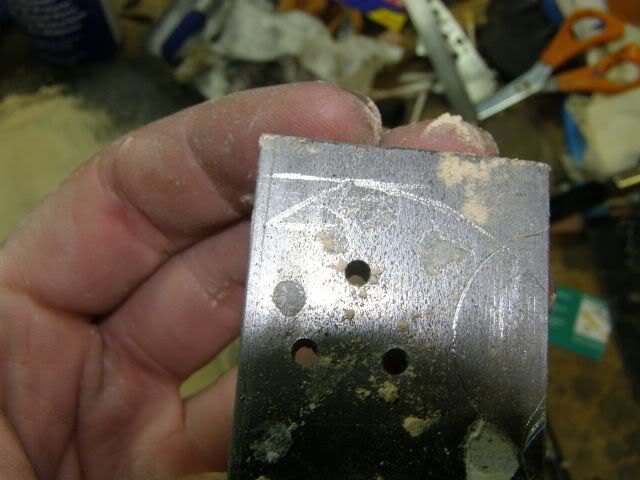
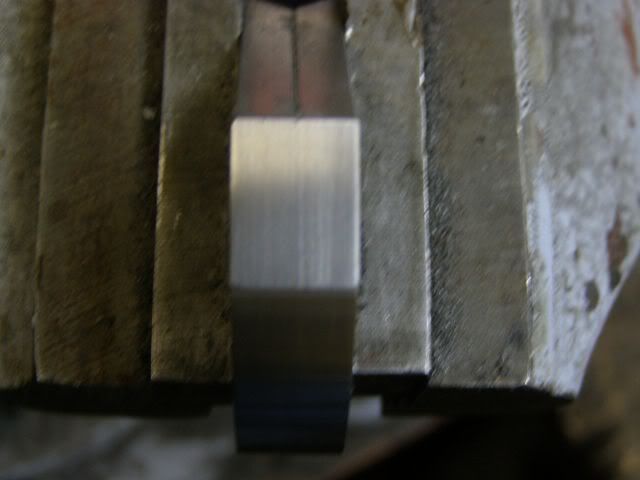
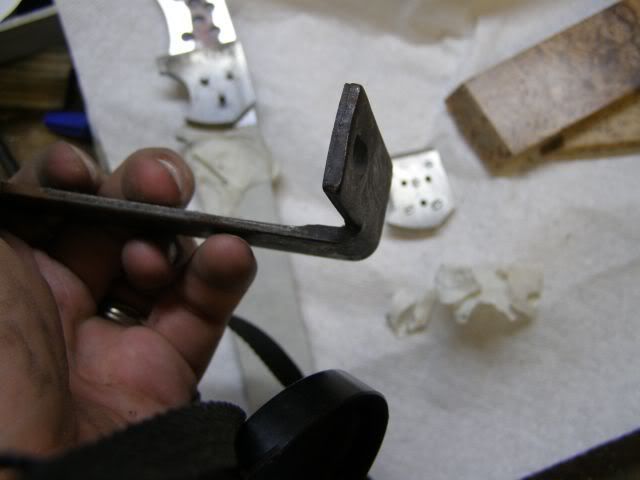
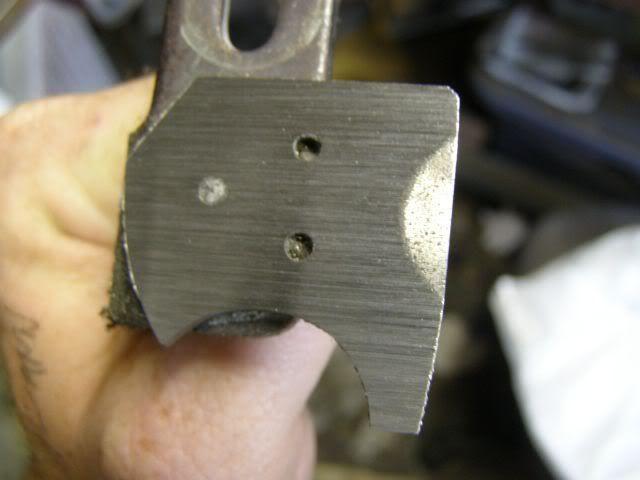
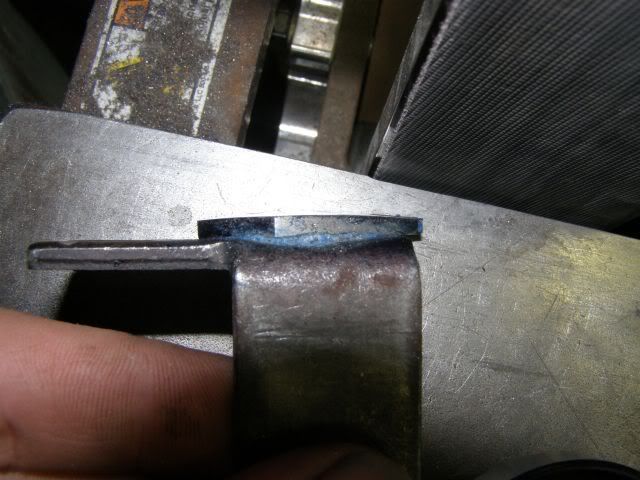
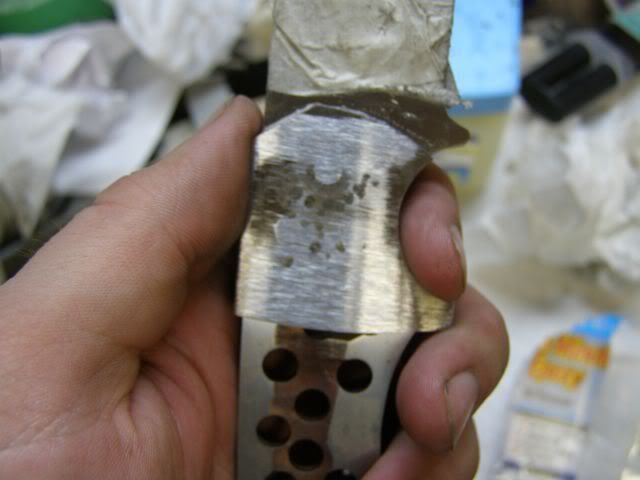
    Here's a shot where I cut down the barstock to make it easier to handle


    if you have any questions on this part let me know

    Comment


      #62
      Next step after dovetailing both ends of the barstock (you don't have to you can do one cut that end off and do the next I just do it one on each end) you need to mark a rough length and cut them off. Like I said earlier 416 is easy to cut with a hacksaw.

      I deleted the wrong picture so you get the dark one. Here I am putting the bolster steel behind the knife and scribing a rough mark on where to cut the steel to length.


      Here are two rough cut dovetailed bolsters one for each side


      Next you need to flat sand the bolsters on the granite plate or whatever flat surface you are using. We are concerned with sanding the side that will be against the knife.


      Here mine are after doing this at 80 grit. When you put the flat sides together you should be able to hold it up to the light and not see any gaps. If you do keep going.


      Next we need to super glue them together. Use Loctite GEL. It will make things a heck of a lot easier if you do


      We need these glued up squared so here's what I do.
      I use a piece of square steel. In this picture I used a guard filing jig I know is square.


      Apply a few dots of super glue


      Tada glued up square (The right one looks a hair off in this picture and I ran out there and checked against a machinst square and it isn't off)

      Comment


        #63
        Doublearrow, Very impressive skills!!! Thanks for sharing.

        Comment


          #64
          Next you need to glue the bolsters to your knife right on the masking tape. Use the guidelines you drew earlier. Sometimes I still do some adjusting and go until it looks right. The gel is a little slower to set up so it gives you some time to move it around. Just a few small dots.


          Make sure it overlaps everywhere on the back that you need it to


          Front view


          Next put the bolsters down on the drill press table and drill through both bolsters. If you get it too hot it will come loose so take it slow.


          After drilling use the knife as the template while the bolster material is still glued and scribe a line on the steel. Use a small drill bit if you don't have a scribe.


          Something I forgot to mention earlier if you have different shaped bolsters like me mark landmark on the spine. Like where the front point comes to, where it meets the spine, and where you want the bolster to end up on bottom. Use the marks you made earlier. Like so


          YOu can see I transfered them over to the bolster material


          Here you can see I used those marks on top to draw lines going down to the points I was talking about. This lets me reproduce the drawing on the knife.


          I didn't mention it earlier because I do it in different steps now but at the same time you are dovetailing the boltste material you need to do the handle material. Even though I have a jig set up I put the bolster material and handle material together on the granite plate several times to check the fit up. Also be careful with the wood dovetails, they are very prone to breaking and chipping. You might be able to notice some chips in mine and that is just the nature of the beast dealing with small burled wood. Also before you you dovetail make sure you have flat sanded the side that will be up against the knife before dovetailing.


          Once you have your lines drawn out on the raw bolster material (it will pull off of the masking tape fairly easily without taking too much tape). You need to rough grind it or shape it. You'll see here that I did not go all the way to the lines. I'll show you that tomorrow.


          If you do by chance get them too hot and the glue seperates cut you some pieces of the pin material you are going to use and glue it back up. Make sure to remove the old superglue with acetone to make it go back together flat.
          Last edited by doublearrow; 06-15-2008, 10:24 PM.

          Comment


            #65
            Originally posted by blackjack001 View Post
            Doublearrow, Very impressive skills!!! Thanks for sharing.

            Thanks blackjack. I never realized how many steps I went through until I started taking pictures. I thought this was going to be a short and sweet tutorial.
            Last edited by doublearrow; 06-15-2008, 10:34 PM.

            Comment


              #66
              quick question, how do you mark the center with your scribe? i my "mentor" has a jig set up but they are pretty pricey in TKS. that is ooking VERY good by the way. i have some more practice to get there, that and you work alot quicker than i do

              Comment


                #67
                Originally posted by theunluckyhunter View Post
                quick question, how do you mark the center with your scribe? i my "mentor" has a jig set up but they are pretty pricey in TKS. that is ooking VERY good by the way. i have some more practice to get there, that and you work alot quicker than i do

                Are you talking about the center of the blade? If so I use a drill bit. Say I'm using 1/8" steel I use an 1/8" drill bit laying flat on a flat surface. The point of the drill bit is exactly in the center of 1/8". If you lay the blade flat on the table and the drill bit flat on the table hold the drill bit steady. Put the knife edge on the drill bit and pull the whole knife edge across the point of the drill bit. There will be a line in the exact center of the blade. If you use 1/4" steel use a 1/4" bit and so on. Let me know if this is what you are talking about. There are pictures at the first part of the tutorial that will give you a better idea.

                Comment


                  #68
                  ok i found it, sorry lol. i am going to finish cutting out and rough grinding a medium sized neck knife today the i am trying to decide on a hollow grind or a scandi. grind since the still is a bit thinner

                  Comment


                    #69
                    Ok got the bolsters on. Didn't get as much as I wanted to get done life got in the way.

                    First off tonight I used the grinder to grind the front of the bolsters to the line. I went up to 400 grit. I used to use a file and vise, it just takes a little patience to get them both even. It helps that they are super glued together


                    Here's the front of them when I got done on the grinder. I have it mounted in a vise


                    Notice the grit marks running side to side. It's personal preference. depending on what mood I am in is what direction they are going. ON this one I decided to go the other way. I hand sanded it just like the blade.


                    Once I get the front polished out I seperate the two. I use a Benzomatic torch and heat them until they fall apart. YOu can also let them sit in a pan of boiling water or on the stove top just be careful. Once they come apart there will be some super glue residue. It will clean up with acetone. Now that we are messing with chemicals I'm gonna throw in the disclaimer use a respirator/mask, rubber gloves, and eye ware for those burning super glue fumes.


                    Once seperated and cleaned I cut pins that will clear both sides of the bolsters and temporarily put them on the knife. I also put the handle material up there. What I'm doing here is checking fit once again.


                    I hold it up to the light and check for gaps. Usually at this point if I have any they are from burs on the metal. I just take 600 grit and rub the burrs off.

                    Next I put the knife in the vise while clamping down on the bolsters to hold them in place. Be carefull not to put the teeth of the vise on the edge of the front. It will deform the front and you will have to reshape them.


                    Using my half round I filed down to the knife blade. I took this picture when I was getting close. I took it down to almost all the way. I left a little room incase it when cockeyed when I peened it.

                    Comment


                      #70
                      From here I start setting up my grinder. The part I'm pointing to can be tilted upto 45° but i use about 4°. I use the tool shown to find it. Basically the front of my bolsters will be thinner than the back. You'll see more of what I mean in later photos.


                      Next this a tool I use to grind my bolsters. It's just a piece of scrap. I glue my bolster to it and I'm able to hold it down on the tool rest and grind the angle onto the bolster.


                      You can do the same thing with a disk sander. Just remember to dunk it in a pail of water ever so often because when the super glue gets hot it lets go. Or if all you have is files you can mount it in a vise.


                      Here you will notice the grind makes a "v" sort of. THat is from rocking it side to side to round the bolster.


                      Here it is with a little more progression


                      Here is a picture showing the thin front and thicker end.


                      Here's a picture showing the curvature


                      Here they are with a rough 400 grit finish. It's not important that it's perfect now you just want a nice smooth grit to peen on.

                      Comment


                        #71
                        Next step I cut the pins. I cut the pins the thickness of the blade, plust the thickness of 2 bolsters, plus the diameter of the pin in this case 1/8" that leaves 1/16" out each end which is perfect. From there I put them in the drill press and give them a quick polish with 600 grit.


                        From here I run a tapered pin reamer down the hole. Basically this widens the top of the hole swedging the pin in the hole. Before I found the tapered pin reamers I would use a drill bit a size to big or a counter sink bit and go down into the hole about .1".


                        Also make sure you polish your ball pien hammer. It will help the pins move. By the way I'm using 416 pins same as the bolster material. If you use anything else they will be even more noticable. The point here is to hide them, it doesn't always happen so that's why I put mine in a pattern that if they do show it won't be that bad.


                        Next clean the bottom of the bolsters and the blade where bolsters will be with acetone. Next put the bolsters on with the pins and apply vaseline with a q tip. This will help big time with the epoxy clean up.


                        For underneath the bolsters I use Devcon 5 minute epoxy. YOu can also use JB weld. If it's your first time doing this I recommend the 2 hour clear epoxy. I tried to take pictures as I did this but I only had a few minutes. The point of the epoxy is NOT to glue the bolster on. It is simply a moisture barrier


                        Apply a thin coat try not to let it go down the holes or it will be seen later.


                        I didn't get the pics of the next step like I wanted too it just set up too fast. Basically put the bolsters on and the pins in. Set one side of the knife on an anvil I use the back of my vise. Take the ball pein and hammer the edges of the pins on the other side. Don't hammer straight down. Flip it over and do the same here. You will keep working the pins down ffrom the edges of the pin. Go all the way around the pin.


                        You can see what I did here kinda. Also be careful of the edge of the anvil if you put it against the front edge you will ding it up and it won't be able to fix it without taking the bolster off. ONce you have the pins hammered down on the edges do it again. Then again. Then once it's hammered down on the edges good beat the middle of the pin straight down like it owes you money. Remember to keep flipping the blade. Make sure the bolsters are against the knife flat and not cockeyed.


                        In these two pictures I took it too the grinder and ground off the head of the pins, you can see the dents where I missed. Hard to hit something that small with a full hammer swing.


                        Make sure to clean up the epoxy and vaseline in front of the bolsters. There may be some squeezed out the back but I'll show you how to clean that up tomorrow. I dont' put vaseline on the back of the boslter because I don't want to take a chance of the glue I use not gluing up.

                        Comment


                          #72
                          Originally posted by LWArchery View Post
                          awsome knives Pm me a price list if you will sale them


                          Let me know if you did not get my pm. Thanks


                          Here in a minute after I grabe a bite to eat I'll post up the pictures of attatching the handle

                          Comment


                            #73
                            Ok guys apparently from what I've read photobucket was hacked. Some people are able to pull it up fine others are not. So I switched to hosting some on imageshack. I can't get it to work the same way but I'll give it a shot.


                            In this picture I'm using a razor blade to clean dried epoxy in the dovetail joint. Using a razor blade and acetone will get it cleaned up.


                            Here's another shot down in the dovetail.


                            The next thing I do is apply four small drops of super glue the same loctite gel I used yesterday on the end of the tang. I do not put any up by the bolster. I'm not trying to permantly glue the handle I just want to hold it in place so that I can drill the pin holes. I will put the wood up to the handle and check the fit a couple of times before I super glue it.


                            Here it is superglued for drilling. In this picture you can notice my tapered tang. This is something I don't know how to do without a disk grinder or a belt grinder so I did not go into that much in the build along.


                            Here's a trick that will help stop problems. Alot of times when drilling through handle material it will splinter when coming out. Makes a really nasty looking hole. One tip is to make the handle oversized before you glue it on and another is to apply masking tape to the exit side of the hole like I've shown here.


                            In this picture I've marked with a pen the holes I'm going to drill out. Sometimes if you're not paying attention you'll poke a hole through the wrong hole. It's pretty frustrating at least that's what I'm told.
                            Last edited by doublearrow; 06-17-2008, 09:25 PM.

                            Comment


                              #74
                              These next few pictures are for drilling odd shaped handle material. It does not apply to the tapered tang so we are not going to worry about that. THe wood I'm using is flat on both sides and the sides are parallel to each other. That's best case scenario. Sometimes like when using stag you can't set the blade perpindicular to the drill bit enough to make the pin go in smooth so here's the solution. I used a small piece of square tubing and cut out one side. I put the flat side of the handle (the part with no wood or handle material yet) against the top side of the tubing and clamp it. I'll let the pictures do most of the talking.


                              The top of the square tubing will be perpendicular to the bit if your table is square so it works perfect.

                              Like I said before my handle material is flat and parallel so I can just lay it flat on the table and drill.


                              After you drill out your holes use a pen or marker and trace around the handle. I don't know if you can see my mark or not.


                              From here a solid tap with the super glued end and the table and the handle will fall off. If you hit it too hard you can damage the dovetail so be careful. Also notice that I rought cut around the line. I didn't take any off up by the dovetail because that would make them more fragile than they already are. You can use a hacksaw, jig saw, scroll saw whatever right here. If all I had were hand tools I'd use the saw to get real close to the line so that I did not have to remove much once the handle is glued up.


                              Once the handle is off keep the drill bit in the drill and make some attempts at roughing up the surface INSIDE of the line you traced out. It roughs up the material for a better hole with epoxy.


                              After all of this I ran the slabs on a flat surface and sandpaper for a couple of passes. If you take too much off they won't fit up against the bolsters correctly. You just want to remove drilling burrs.

                              Comment


                                #75
                                Here I cut pins to length. They stick out about an 1/8" of in inch on both sides of the handle material once assembled. In the middle you will notice there are rings going around the pins. This is to make a mechanical bond with the epoxy not just a chemical bond. I used a band saw but you can use a hacksaw, file, or dremel tool. I've used them all. Don't get too far out from the middle or the rings will show once the handle is shaped.


                                IN this picture you will notice I have the pin in the drill press. I use emery cloth and polish the pins so that they slide in and out of every hole with a smooth yet firm push. Most pin material is a bit larger than it's sold as so this is almost always necessary. Most makers say to use a larger drill bit, but I like the fit to be tight.


                                Here's another thing I like to do. I take 60 grit paper and run it over the tang to rough it up for epoxy.


                                When starting the glue up it helps to have everything organized so that it goes quickly. I put the knife together dry so that I can make sure I can get the process down.


                                Next clean everything up with acetone. Even the wood. Acetone will evaporate so give it a little time before you apply epoxy. Make sure you remove all of the dried super glue from the drilling process. Use rubber gloves and if you are using a hollow tube like I am on the last pin to put a strap through run a qtip and vaseline down the tube.
                                For epoxy after seeing several test done I use Brownelle's acra glass. That stuff is awesome. It usually has to be ordered but our local gun dealer keeps it in stock for cheaper. A bunch of makers use Devcon 2 ton epoxy with the 2 hour cure time. Supposedly the faster the cure the weaker the epoxy.


                                Acraglass stinks, is hard to clean up, and when mixed in a cup will get EXTREMELY hot more than once I've found a cup of it smoking while it cures.If you use acraglass put tape on the ENTIRE blade acetone will not soften it and clean it up like it does regular epoxy.

                                I also use these clamps I got from walmart. I do not like using Cclamps for this because they can torque the material enough even with pins to throw things off. These apply a good amount of pressure and do not squeeze it all out.


                                I did not show the gluing process because that's a pain to do. But simply put slather one slab with epoxy and then slather the same side on the knife handle and put it roughly in place. I use a popscicle stick. Next do the other side. Next dip your pins in the epoxy and fill up the drilled holes with epoxy and push the pins into place. This will get messy and make sure you're wearing rubber gloves.

                                Next apply the clamps. Try to make sure the slabs are being pressed all the way down with no gaps. Also these clamps will not glue to the slabs because of the rubber pads.


                                One last shot of the acraglass starting to boil. On a knife handle because the layer is so thin it will actually take some time to cure. I leave it overnight. In the cup within 10 minutes the heat will cure itself and it will harden.

                                Comment

                                Working...
                                X