I was inspired by a YouTube video to build my own acrylic fish tank. I liked the idea of building a multi-chambered tank that I could adjust individual water parameters on. I called around to a few acrylic sheet dealers and was able to pick up the cuts I needed for around $160.
I purchased the following sheets in 3/8", clear, cell cast acrylic:
3 - 48"x12"
5 - 12"x11 1/4"
I also ordered an acrylic edge scraper, a pint of Weld-On 4, and two half ounce applicators for $54 with shipping.
My buddy Zach came over one evening and helped me get everything ready and together. I didn't document every step, but I got a few photos along the way.
After we got all the edges scraped and free of saw marks, we peeled back the protective paper from the edges of the acrylic.
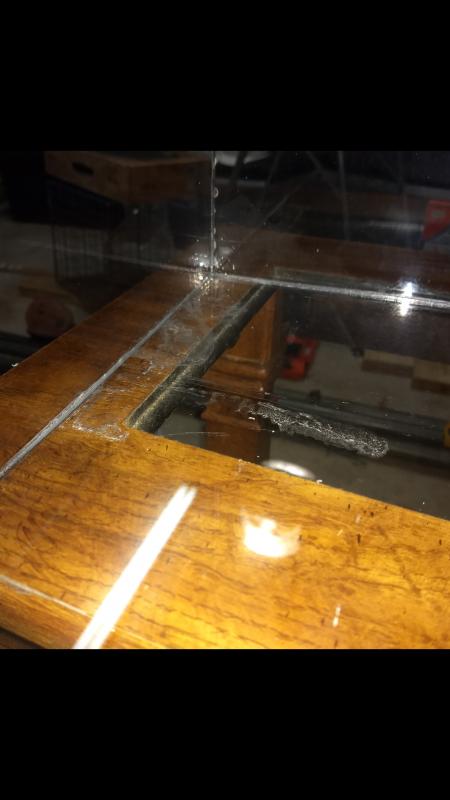
We squared everything off clamped our sheets down (just enough to keep stuff from moving) and began the process of welding. Acrylic is not like glass, and silicone cannot be used. You have to use a chemical "welding" process to melt the sheets to one another.
We welded the front sheet to the bottom, both sides, the interior dividers, and finally the back panel.


After we had everything welded, I went to a wedding for a couple days while the tank cured.
When I returned, I went through the painstaking process of polishing the acrylic where I got a little sloppy with the welding.


Luckily, if you take your time acrylic polishes up pretty clear, and I had a finished tank. After I finished up the polishing we had a party at the house and I had to wrap up my work for the day.
The following day I tested the tank for leaks, cleaned it off and moved it upstairs. The base is a table I got on Craigslist for $40.

That concludes Part 1. Part 2 (which I will post tomorrow) will be substrates, stone, wood, plants, filters, lighting, fish, and the finished tank.
Thanks for tuning in!
I purchased the following sheets in 3/8", clear, cell cast acrylic:
3 - 48"x12"
5 - 12"x11 1/4"
I also ordered an acrylic edge scraper, a pint of Weld-On 4, and two half ounce applicators for $54 with shipping.
My buddy Zach came over one evening and helped me get everything ready and together. I didn't document every step, but I got a few photos along the way.
After we got all the edges scraped and free of saw marks, we peeled back the protective paper from the edges of the acrylic.
We squared everything off clamped our sheets down (just enough to keep stuff from moving) and began the process of welding. Acrylic is not like glass, and silicone cannot be used. You have to use a chemical "welding" process to melt the sheets to one another.
We welded the front sheet to the bottom, both sides, the interior dividers, and finally the back panel.
After we had everything welded, I went to a wedding for a couple days while the tank cured.
When I returned, I went through the painstaking process of polishing the acrylic where I got a little sloppy with the welding.
Luckily, if you take your time acrylic polishes up pretty clear, and I had a finished tank. After I finished up the polishing we had a party at the house and I had to wrap up my work for the day.
The following day I tested the tank for leaks, cleaned it off and moved it upstairs. The base is a table I got on Craigslist for $40.
That concludes Part 1. Part 2 (which I will post tomorrow) will be substrates, stone, wood, plants, filters, lighting, fish, and the finished tank.
Thanks for tuning in!
 .
.
Comment