Announcement

Collapse
No announcement yet.

my version of the cattle panel blind

Collapse
X
 
  • Filter
  • Time
  • Show
Clear All
new posts

    my version of the cattle panel blind

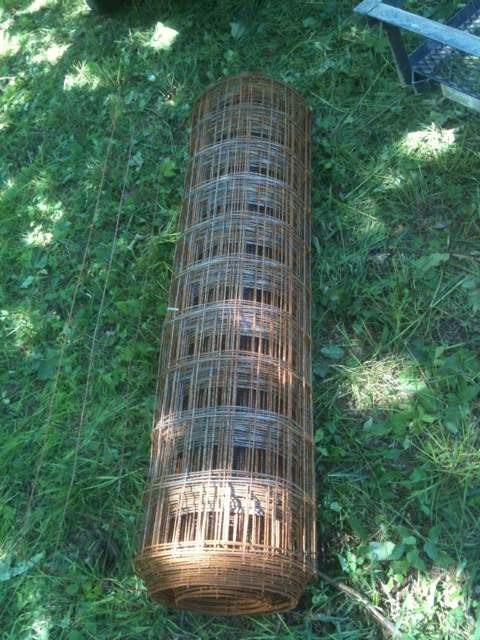
    I mimicked several ideas I got from tbh'ers and this is what I came up with. I used remesh from Home Depot instead of cattle/ hog panels:
    Click image for larger version

Name:	ImageUploadedByTapatalk1335277792.578007.jpg
Views:	1
Size:	110.1 KB
ID:	24896968
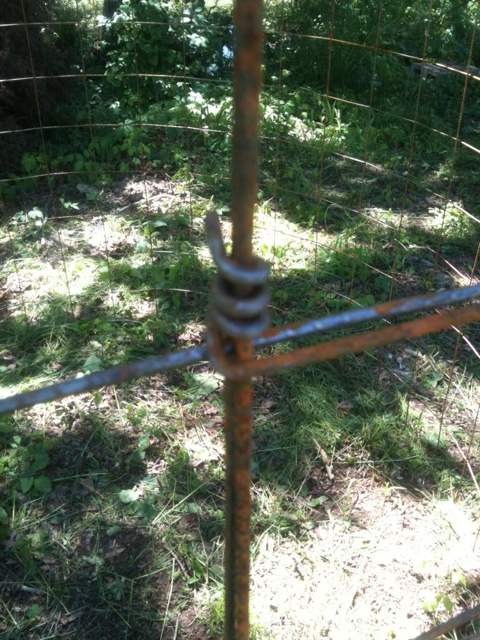
    Wired it up mainly with the excess tabs and a few pieces of baling wire:
    Click image for larger version

Name:	ImageUploadedByTapatalk1335277867.241433.jpg
Views:	1
Size:	111.4 KB
ID:	24896969
    I wanted a big enough stand to fit two comfortably so I went for a 6' diameter and a domed roof. We cut strips of equal lengths to make sure the overall shape was somewhat symmetrical:
    Click image for larger version

Name:	ImageUploadedByTapatalk1335277946.338334.jpg
Views:	1
Size:	98.8 KB
ID:	24896970
    We covered the roof in 2 mil plastic just to provide a little extra protection against the wet stuff:
    Click image for larger version

Name:	ImageUploadedByTapatalk1335278066.729017.jpg
Views:	1
Size:	95.0 KB
ID:	24896971
    Then came the messy part; dipping the sheets in exterior latex paint and wrapping the whole thing:
    Click image for larger version

Name:	ImageUploadedByTapatalk1335278153.358705.jpg
Views:	1
Size:	95.3 KB
ID:	24896972
    My hands were covered in paint during this process so no action pics. We immediately cut the door and windows. I cut another piece of remesh that would overlap the whole door opening and skinned it with an old military tarp using zip ties. We connected it from the inside so it swings up:
    Click image for larger version

Name:	ImageUploadedByTapatalk1335278320.845094.jpg
Views:	1
Size:	51.2 KB
ID:	24896973
    Click image for larger version

Name:	ImageUploadedByTapatalk1335278352.710012.jpg
Views:	1
Size:	78.8 KB
ID:	24896974
    I plan to use a hook system to attach either shoot through mesh or camo netting. We didn't cut out windows near the back of it to prevent being silhouetted. Depending on positioning, we may re-think that. I think once it fully dries, the paint will really add a lot of protection from the elements. Probably more than I expected. Let me know what you guys think.
    Click image for larger version

Name:	ImageUploadedByTapatalk1335278381.796597.jpg
Views:	1
Size:	82.0 KB
ID:	24896975
    Last edited by Dchilds; 04-24-2012, 08:48 AM.

    #2
    Nice!!

    Comment


      #3
      That is a great idea... Are you going to paint the cover with green, black or gray's

      Comment


        #4
        looks good. im curious to see the durability of these. do you know if they will last longer than a pop up? i understand you could just re-sheet them but just a thought.

        Comment


          #5
          Originally posted by CBMatt View Post
          That is a great idea... Are you going to paint the cover with green, black or gray's
          I plan to lay down a little spray paint after it dries. It was still pretty wet when we left on Sunday after having put it together on Saturday afternoon. That might give you an idea of how soaked those sheets were. Plus it was pretty humid outside. I will also do some brushing in.


          Originally posted by TheRealHatfield View Post
          looks good. im curious to see the durability of these. do you know if they will last longer than a pop up? i understand you could just re-sheet them but just a thought.
          I thought about a popup but had some reservations about them. It would have been hard for me to find a pop up the exact dimensions I was looking for. If I did find one, I would guess it would be in the $200 price range; but probably more. I did not want to leave a $200 pop up outside all season. I also think the skin on this thing will be more resistant to the elements. On top of all this, the roll of remesh was $107. I can build a lot of these with the 150’ roll. I think the total used here was around 35’. Paint was free and the sheets were $10 at Goodwill but I probably could have gotten those for free if I’d asked friends and family.

          One thing I would have liked to have when putting this together is some kind of “ring” to use as a frame for the floor. This one will sit on the ground but I wish there was a little more rigidity to the structure near the bottom. Probably over-engineering in my head a little but it would make me more comfortable moving it around and what not.

          Comment


            #6
            I like that idea a lot. I think it is wise to not have shooting windows in the back (other than maybe small viewing windows you can open and take a peek behind you) How much paint, and how many sheets did it take?

            Comment


              #7
              Originally posted by jerp View Post
              I like that idea a lot. I think it is wise to not have shooting windows in the back (other than maybe small viewing windows you can open and take a peek behind you) How much paint, and how many sheets did it take?
              I think I ended up using two fitted queen sheets and two and a half flat queen sheets. I tried to leave them all in tact to avoid unnecessary seams. I used about four gallons of paint, believe it or not. I rolled on an extra coat (mistily focusing on the top) Sunday morning.

              Couple other things I've thought about. I would probably use king sheets if I had the choice. Even less seams. This seems funny but I'd probably try to find sheets that are rougher and/or thicker than what I had. Mine seemed pretty thin. Once they're on there, I don't think it matters but getting them stretched over the blind gave us a little trouble. They seemed to snag and nearly rip a few times. I might cut a small viewing hole in the back just to be able to peek out if I hear something back there.

              Comment


                #8
                Nice job!

                Comment


                  #9
                  Very nice.

                  Comment


                    #10
                    Looks great. Please post up some finished pics as well.

                    Comment


                      #11
                      Nice work.

                      Comment


                        #12
                        Cool blind. About how tall inside is it?

                        Comment


                          #13
                          Originally posted by unclefish View Post
                          Cool blind. About how tall inside is it?
                          In the middle it's around 6'7". I wanted the option to stand and shoot if I ever needed to. I'm 6'3" so it works.

                          The window height would probably make a standing shot tough but I like the extra space.

                          Comment


                            #14
                            Looks good. I may try one of these myself.

                            Comment


                              #15
                              That aught to work out just fine. Nice job.

                              Comment

                              Working...
                              X