Announcement

Collapse
No announcement yet.

My Golf Cart Build

Collapse
X
 
  • Filter
  • Time
  • Show
Clear All
new posts

    My Golf Cart Build

    I got this cart a couple months ago and it has taken me some time to get the ball rolling on fixing it up the way I want it. With season getting close, I figured I had better get started. I was planning on waiting until it was complete to post this but figured I would post up progress as it went along.

    This is how she looked the day I brought her home.

    Click image for larger version

Name:	GC1.jpg
Views:	1
Size:	63.0 KB
ID:	24921266

    I got my lift, tire, and wheel kit in a couple weeks later but of course it sat in the garage for a while before anything got done with it. After the install, the cart really started to look like something that would be useful in the field.

    Click image for larger version

Name:	GC2.jpg
Views:	1
Size:	55.7 KB
ID:	24921267

    Next, I stripped of the factory plastic bumper off the front and back to get to the frame so that I could add the racks the way I had dreamt them up in my mind.

    Click image for larger version

Name:	GC3.jpg
Views:	1
Size:	50.6 KB
ID:	24921268

    Click image for larger version

Name:	GC4.jpg
Views:	1
Size:	47.5 KB
ID:	24921269

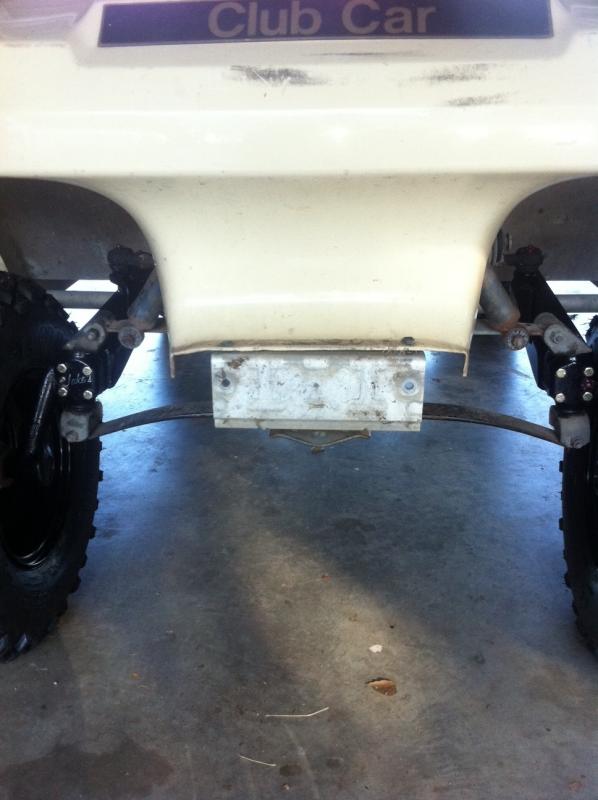
    Last night I started on the back rack. Using a piece of 2" x 2" angle to bolt on the back brackets where the plastic bumper used to be bolting it on through the existing holes.

    Click image for larger version

Name:	GC5.jpg
Views:	1
Size:	46.0 KB
ID:	24921270

    I actually got the entire frame of the back rack completed but did not take a picture. Stay tuned, hope to spend some rainy time in the garage this weekend hammering it out.

    #2
    watching!

    Comment


      #3
      Awesome

      Comment


        #4
        Cool! Watching here too.

        Comment


          #5
          looking good

          Comment


            #6
            looks good, great project

            Comment


              #7
              Got after it this morning.

              Bolted the back rack frame up first.

              Click image for larger version

Name:	ImageUploadedByTapatalk1347749888.302465.jpg
Views:	1
Size:	54.9 KB
ID:	24117179

              Used some small pipe for bushings to make up the difference in bolt to spots.

              Click image for larger version

Name:	ImageUploadedByTapatalk1347749977.763199.jpg
Views:	1
Size:	41.8 KB
ID:	24117181

              Got the expanded metal tacked on and figured the old plastic factory rear bumper would work great as a shin guard and keep the corners covered so I welded on a couple brackets and bolted it up.

              Click image for larger version

Name:	ImageUploadedByTapatalk1347750116.462220.jpg
Views:	1
Size:	56.0 KB
ID:	24117184

              Click image for larger version

Name:	ImageUploadedByTapatalk1347750093.578564.jpg
Views:	1
Size:	78.3 KB
ID:	24117182

              Click image for larger version

Name:	ImageUploadedByTapatalk1347750136.954567.jpg
Views:	1
Size:	52.0 KB
ID:	24117185

              Comment


                #8
                Got the front rack welded up and bolt brackets installed.

                Click image for larger version

Name:	ImageUploadedByTapatalk1347750254.785382.jpg
Views:	1
Size:	74.4 KB
ID:	24117186

                Click image for larger version

Name:	ImageUploadedByTapatalk1347750276.237608.jpg
Views:	1
Size:	60.7 KB
ID:	24117187

                I have to say that getting the bolts through the brackets and bushings while getting them to thread back into the factory holes was tough but I got it that far.

                Click image for larger version

Name:	ImageUploadedByTapatalk1347750370.595870.jpg
Views:	1
Size:	64.4 KB
ID:	24117188

                Front bumper is next and the braces to level and support the front rack will attach to it.

                Comment


                  #9
                  Nice

                  Comment


                    #10
                    nice - keep the pics coming

                    Comment


                      #11
                      Looking great!!

                      Comment


                        #12
                        Looking good!

                        Comment


                          #13
                          Looking real good.

                          Comment


                            #14
                            Lookin good!

                            Comment


                              #15
                              Nice work

                              Comment

                              Working...
                              X